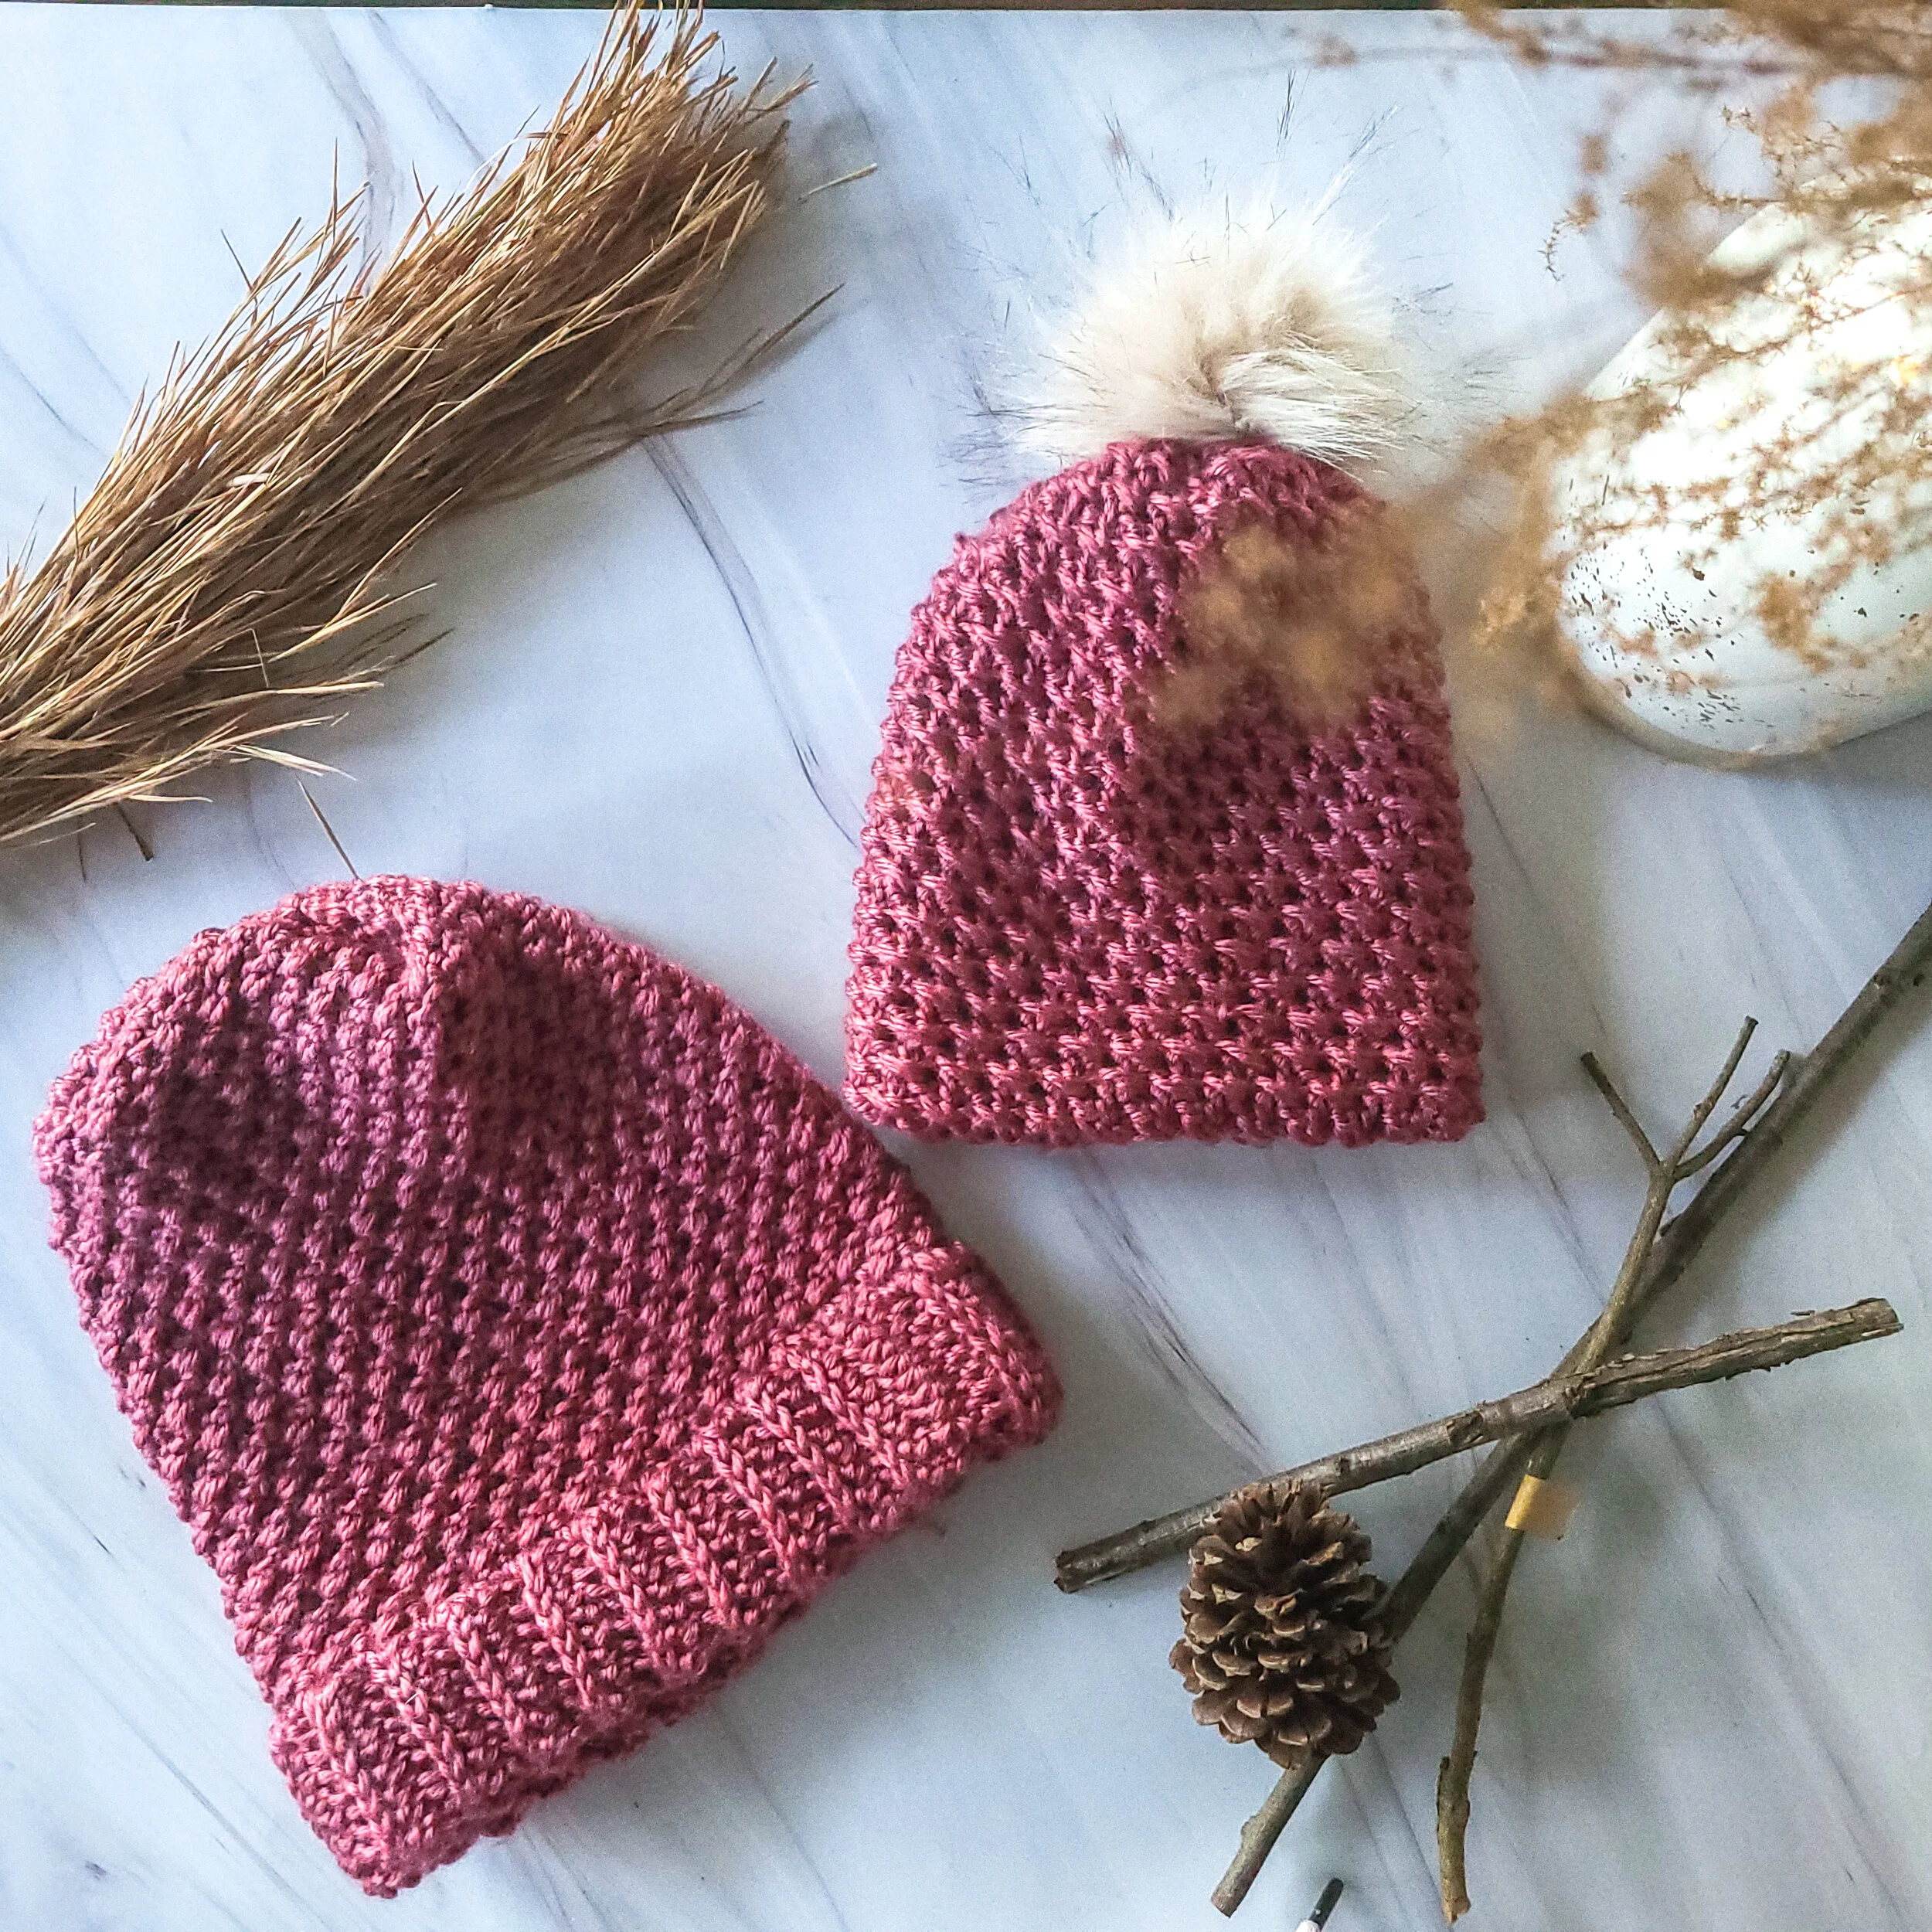
Amalfi Beanie: Free Crochet Pattern
When you have the perfect pom pom, you need the perfect hat. I won several glorious pom poms in a giveaway on Instagram and just knew I would make something stunning with them. I grabbed some pink yarn leftover from my Zinnia Blanket and a blue self-striping yarn that has been discontinued, but is oh-so-dreamy. I made the hat in a single evening, I felt so inspired!
I’d originally planned to name this the Principessa Beanie, since I liked the “crown” created by working a single repeat of the shells in the contrast color. However, as my testers sent in their pictures and the comments came flooding in, the word “mermaid” started coming up. Then I saw it. It IS a mermaid hat! I firmly believe that if mermaids live anywhere, it is near the beautiful and romantic Amalfi Coast in Italy.
Save it to your favorite board on Pinterest
Or share on your favorite social media sites!

Mermaid inspired beanie crochet pattern #crochetbeanie #mermaidfashion #crochet
This post contains affiliate links. I receive a small commission from your purchase through these links at no additional cost to you. See my Terms of Use for more details.
Yarn
I used a light worsted weight or DK weight yarn for this pattern. If you use a thicker worsted weight (like I Love This Yarn from Hobby Lobby, Red Heart Super Saver, etc) the hat may come out a bit too big. With thinner yarn, you get those beautiful, tight shells. I used a variety of yarns in my stash for these hats. The dark pink is Mighty Stitch, a merino wool/acrylic blend from We Crochet. The light pink is Caron Simply Soft. The blue is all from a single, discontinued skein of Hobby Lobby Lux Lollies - however, I believe this yarn is very similar to Red Heart Unforgettable or We Crochet Chroma Worsted.

Shop We Crochet Yarn by Clicking the Picture!

Hook
I used my Furls Supernova for this project. It is a resin hook that is just so comfortable and beautiful to work with! As someone who struggles with tendonitis in my wrists, using a high quality ergonomic hook is important for the health of my hands. Of course, the fact that they are pieces of art definitely helps!

Shop Furls Hooks
Now, I realize the Furls hooks can be a little pricier. I feel like they are worth it for as much time as I spend crocheting, but it might not be something you feel you can invest in. However, I still highly recommend an ergonomic crochet hook. Check out these more affordable hooks and tools from We Crochet!

Those AMAZING Pom Poms!
I received these pom poms as part of a giveaway prize from the Etsy shop Love Stitches All. You can check out her shop here.
The details
This is an intermediate difficulty pattern. Several of the techniques used in this pattern might be a little challenging to new crocheters. The PDF pattern includes more pictures for how the stitches are formed and how the pattern builds up. The PDF pattern also includes extended sizes (infant, toddler, child, youth/adult). Only the toddler and youth/adult patterns are included in this blog post.
If you want the PDF with the extra features and details, it is available for $5 in my Etsy or Ravelry shops.


Ravelry
The Pattern
And here we go!
Materials:
Worsted Weight/4 Wool or Acrylic Yarn
I used We Crochet Mighty Stitch 208 yd/100g per skein
Toddler: 150 yds Adult: 300 yds
Optional: 50-100 yds of a second color of yarn
5 mm Hook
Yarn Needle to weave in ends
Optional: Pom Pom and Button
Stitches and Terms (U.S. Terms)
Ch - Chain
CA - Color A
CB - Color B
Blo - Back Loop Only
Bpsc - Back Post Single Crochet
Ea - Each
Fptr - Front Post Treble Crochet
Sc - Sincle Crochet
Sc Dec - Single Crochet Decrease
Shell - 5 dc in same st
St - Stitch
Tr - Treble Crochet
Gauge
10 st x 9 rows = 2”
Gauge is worked in rows of sc in blo.
Special Stitches
Fptr: Yarn over twice, pick up a loop from around the post of the indicated stitch (4 loops on the hook). Yarn over, pull through two loops (three loops left on the hook), yarn over, pull through two loops (two loops left on hook), yarn over, pull through last two loops.
Notes
Stitches between *asterisks* are repeated. Stitches between {brackets} are repeated.
Stitches in (parentheses) are made in the same stitch or space.
Turn for brim rows. DO NOT TURN for the body of the hat rounds.
The chain stitches in this pattern do not count as a stitch.
I used a light worsted weight yarn. Yarn substitutes include Caron Simply Soft, Red Heart Unforgettable, or a thicker DK weight yarn.
The pattern is written in two portions, the brim and the body of the hat.
Treble Crochet stitches should be made tightly. Feel free to leave off a shell repeat if the hat seems too tall.
Illustrations on page 11-12
Infant: 11" wide x 8" tall Toddler: 14" wide x 9" tall
Child: 16" wide x 12" tall Adult: 18" wide x 12" tall
Toddler
Brim Row 1: CA: Ch 11, turn, sc in 2nd ch from hook and in each ch. (10 sts)
Brim Row 2-60: Ch 1, sc in blo in ea st. (10 sts)
Fold the brim in half and slip stitch the row 1 to row 60. Turn so the seam is on the inside and pick up CB for the first round of the hat. (10 sts)
Round 1: CB: Ch 1, sc in the side of each brim row around. Join with a sl st to the first sc. (60 sts)
Rounds 2: Ch 1, sc in first st and next 3 st, *sk 2 st, shell in next st, sk 2 st, sc in next 7 st* repeat until 5 st remain, sk 2 st, sc in last 3 st, join with sl st to first sc. (60 sts)
Rounds 3: Ch 1, sc in first st and next 2 st, *sk 1 st, fptr in first dc of shell, {tr BETWEEN first and second dc, fptr in next dc}, repeat 3 more times, sk 1 st, sc in next 5 st* repeat until 3 st remains, sk 1 st, sc in last 2 st, join with sl st to first sc. (70 sts)
Rounds 4: Ch 1, sc in first 2 st, sk 1 st, *{fptr around next fptr, tr BETWEEN fptr and tr, tr BETWEEN tr and fptr} repeat four more times, fptr around next st, sk 1 st, sc in next 3 st,* repeat until 2 st remain, sk 1 st, sc in last st, sl st to first st. (80 sts)
Round 5: Ch 1, sc in first st, sk 1 st, *bpsc in next 13 st, sk 1 st, sc in middle sc, sk 1 st,* repeat around, join with sl st to first st. (70 sts)
Round 6: CA: Ch 2, shell in 1st sc of row 2, *sk 3 bpsc, sc in next 7 bpsc, sk 3 bpsc, shell in middle sc of the 7 sc from row 2,* repeat until 3 st remain, sk 3 st, sl st to first dc. (60 sts)
Round 7: Ch 2, *fptr around first dc of the shell, {tr BETWEEN first and second dc, fptr in next dc}, repeat 3 more times, sk 1 st, sc in next 5 st, sk 1 st,* repeat until the end, sl st to first st. (70 sts)
Round 8: Ch 2, *{fptr around next fptr, tr BETWEEN fptr and tr, tr BETWEEN tr and fptr} repeat 3 more times, fptr around next st, sk 1 st, sc in next 3 st,* repeat around, sl st to first st. (80 sts)
Round 9: Ch 1, *bpdc around next 13 st, sk 1, sc in next st, sk 1* repeat around, sl st to first st. (70 sts)
Round 10: CB: Sl st in last st of round 9 so you start in the sc, ch 1, *shell in the middle sc of the 7 sc of row 6, sk 3 st, sc in next 7 st, sk 3 st,* repeat to the end, join with sl st to the firs st. (60 sts)
Round 11: Ch 2, *fptr around first dc of the shell, {tr BETWEEN first and second dc, fptr in next dc}, repeat 3 more times, sk 1 st, sc in next 5 st, sk 1 st,* repeat until the end, sl st to first st. (70 sts)
Round 12: Ch 2, *{fptr around next fptr, tr BETWEEN fptr and tr, tr BETWEEN tr and fptr} repeat four more times, sk 1 st, sc in next 3 st,* repeat around, sl st to first st. (80 sts)
Round 13: Ch 1, *bpdc around next 13 st, sk 1, sc in next st, sk 1* repeat around, sl st to first st. (70 sts)
Round 14-17: Repeat rounds 10-13 once.
Round 14: Ch 1, *sc in next 3 st, sc dec across 2 st,* repeat around (56 st)
Round 15: Ch 1, *sc in next 2 st, sc dec across 2 st* repeat around. (42 sts)
Round 16: Ch 1, *sc in next st, sc dec across 2 st* around. Fasten off. Leave a long tail for seaming. (28 sts)
Continue to Seaming.

Grab the perfect project bag!
Adult
Brim Row 1: CA: Ch 11, turn, sc in 2nd ch from hook and in each ch. (10 sts)
Brim Row 2-84: Ch 1, sc in blo in ea st. (10 sts)
Fold the brim in half and slip stitch the row 1 to row 84. Turn so the seam is on the inside and pick up CB for the first round of the hat. (10 sts)
Round 1: CB: Ch 1, sc in the side of each brim row around. Join with a sl st to the first sc. (84 sts)
Rounds 2: Ch 1, sc in first st and next 3 st, *sk 2 st, shell in next st, sk 2 st, sc in next 7 st* repeat until 5 st remain, sk 2 st, sc in last 3 st, join with sl st to first sc. (84 sts)
Rounds 3: Ch 1, sc in first st and next 2 st, *sk 1 st, fptr in first dc of shell, {tr BETWEEN first and second dc, fptr in next dc}, repeat 3 more times, sk 1 st, sc in next 5 st* repeat until 3 st remains, sk 1 st, sc in last 2 st, join with sl st to first sc. (98 sts)
Rounds 4: Ch 1, sc in first 2 st, sk 1 st, *{fptr around next fptr, tr BETWEEN fptr and tr, tr BETWEEN tr and fptr} repeat four more times, fptr around next st, sk 1 st, sc in next 3 st,* repeat until 2 st remain, sk 1 st, sc in last st, sl st to first st. (112 sts)
Round 5: Ch 1, sc in first st, sk 1 st, *bpsc in next 13 st, sk 1 st, sc in middle sc, sk 1 st,* repeat around, join with sl st to first st. (98 sts)
Round 6: CA: Ch 2, shell in 1st sc of row 2, *sk 3 bpsc, sc in next 7 bpsc, sk 3 bpsc, shell in middle sc of the 7 sc from row 2,* repeat until 3 st remain, sk 3 st, sl st to first dc. (84 sts)
Round 7: Ch 2, *fptr around first dc of the shell, {tr BETWEEN first and second dc, fptr in next dc}, repeat 3 more times, sk 1 st, sc in next 5 st, sk 1 st,* repeat until the end, sl st to first st. (98 sts)
Round 8: Ch 2, *{fptr around next fptr, tr BETWEEN fptr and tr, tr BETWEEN tr and fptr} repeat 3 more times, fptr around next st, sk 1 st, sc in next 3 st,* repeat around, sl st to first st. (112 sts)
Round 9: Ch 1, *bpdc around next 13 st, sk 1, sc in next st, sk 1* repeat around, sl st to first st. (98 sts)
Round 10: CB: Sl st in last st of round 9 so you start in the sc, ch 1, *shell in the middle sc of the 7 sc of row 6, sk 3 st, sc in next 7 st, sk 3 st,* repeat to the end, join with sl st to the firs st. (84 sts)
Round 11: Ch 2, *fptr around first dc of the shell, {tr BETWEEN first and second dc, fptr in next dc}, repeat 3 more times, sk 1 st, sc in next 5 st, sk 1 st,* repeat until the end, sl st to first st. (98 sts)
Round 12: Ch 2, *{fptr around next fptr, tr BETWEEN fptr and tr, tr BETWEEN tr and fptr} repeat four more times, sk 1 st, sc in next 3 st,* repeat around, sl st to first st. (112 sts)
Round 13: Ch 1, *bpdc around next 13 st, sk 1, sc in next st, sk 1* repeat around, sl st to first st. (98 sts)
Round 14-25: Repeat rounds 10-13 three times.
Round 26: Ch 1, *sc in next 3 st, sc dec across 2 st,* repeat around (74 sts)
Round 27: Ch 1, *sc in next 2 st, sc dec across 2 st* repeat around. (50 sts)
Round 28: Ch 1, *sc in next st, sc dec across 2 st* around. Fasten off. Leave a long tail for seaming. (25 sts)
Continue to Seaming.
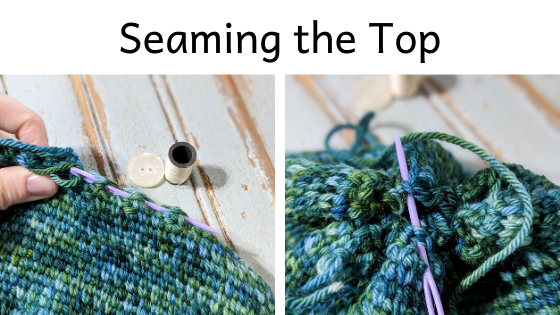
Seaming
1. Turn hat inside out.
2. Thread the long tail through the yarn needle.
3. Weave the needle in and out of the final row of stitches.
4. Pull tight.
5. Place several, secure stitches in an “x” shape over the cinched up crown.
6. Fasten off securely and weave in the end.
Pom Pom
1. With hat still inside out, place button on the seam.
2. Using thread needle and matching thread, sew the button to the inside of the seam.
3. Fasten off the thread.
4. Turn hat right side out, using a hook (or your fingers), thread the elastic loop from the faux fur pom pom through the stitches of the crown and loop it over the button.

Don’t forget to check out these other beanie patterns!

San Fior Slouch Hat
Hanover Beanie
Thank you for making the Amalfi Beanie!
This pattern is written by Rebekah Haas. I hold the copyright to this pattern. It should not be published, shared, or sold without direct permission of the designer. You are, of course, welcome to sell any items you make using this pattern. If you post pictures of your item on Instagram or Facebook, please credit me with the design by linking to my Instagram account or website. Thank you for choosing to make my pattern! I hope it inspires you!