


Amalfi the Baby Jellyfish: Free Crochet Pattern
Named for the bright Italian coastal city, Amalfi the Amigurumi Jellyfish is the perfect gift for any baby. Studies have shown that infants in the NICU like to hold the tentacles, which remind them of the umbilical cord they held onto for months in utero. Also, since the baby is holding onto the tentacles, she is less likely to grab onto or pull out any tubes or IV’s the baby may need. The babies that hold onto their sweet crochet jellyfish perform better, exhibiting signs of a contented baby (i.e. heartbeats, breathing, and oxygen use). If I can, through my craft, help these precious babies heal or grow stronger quicker - you can bet I’ll be all over that! Read more about the preemie octopus effect here. Even though none of my babies spent time in the NICU, I love the idea of using my craft to help the smallest of our sweet little ones to grow strong. This free crochet jellyfish pattern is a fresh take on the traditional preemie octopus, featuring fully customizable eyes, cheeks, different color tentacles, and of course, that sweet ruffle.
If you like it, Pin it!
And follow me on Pinterest while you are there!
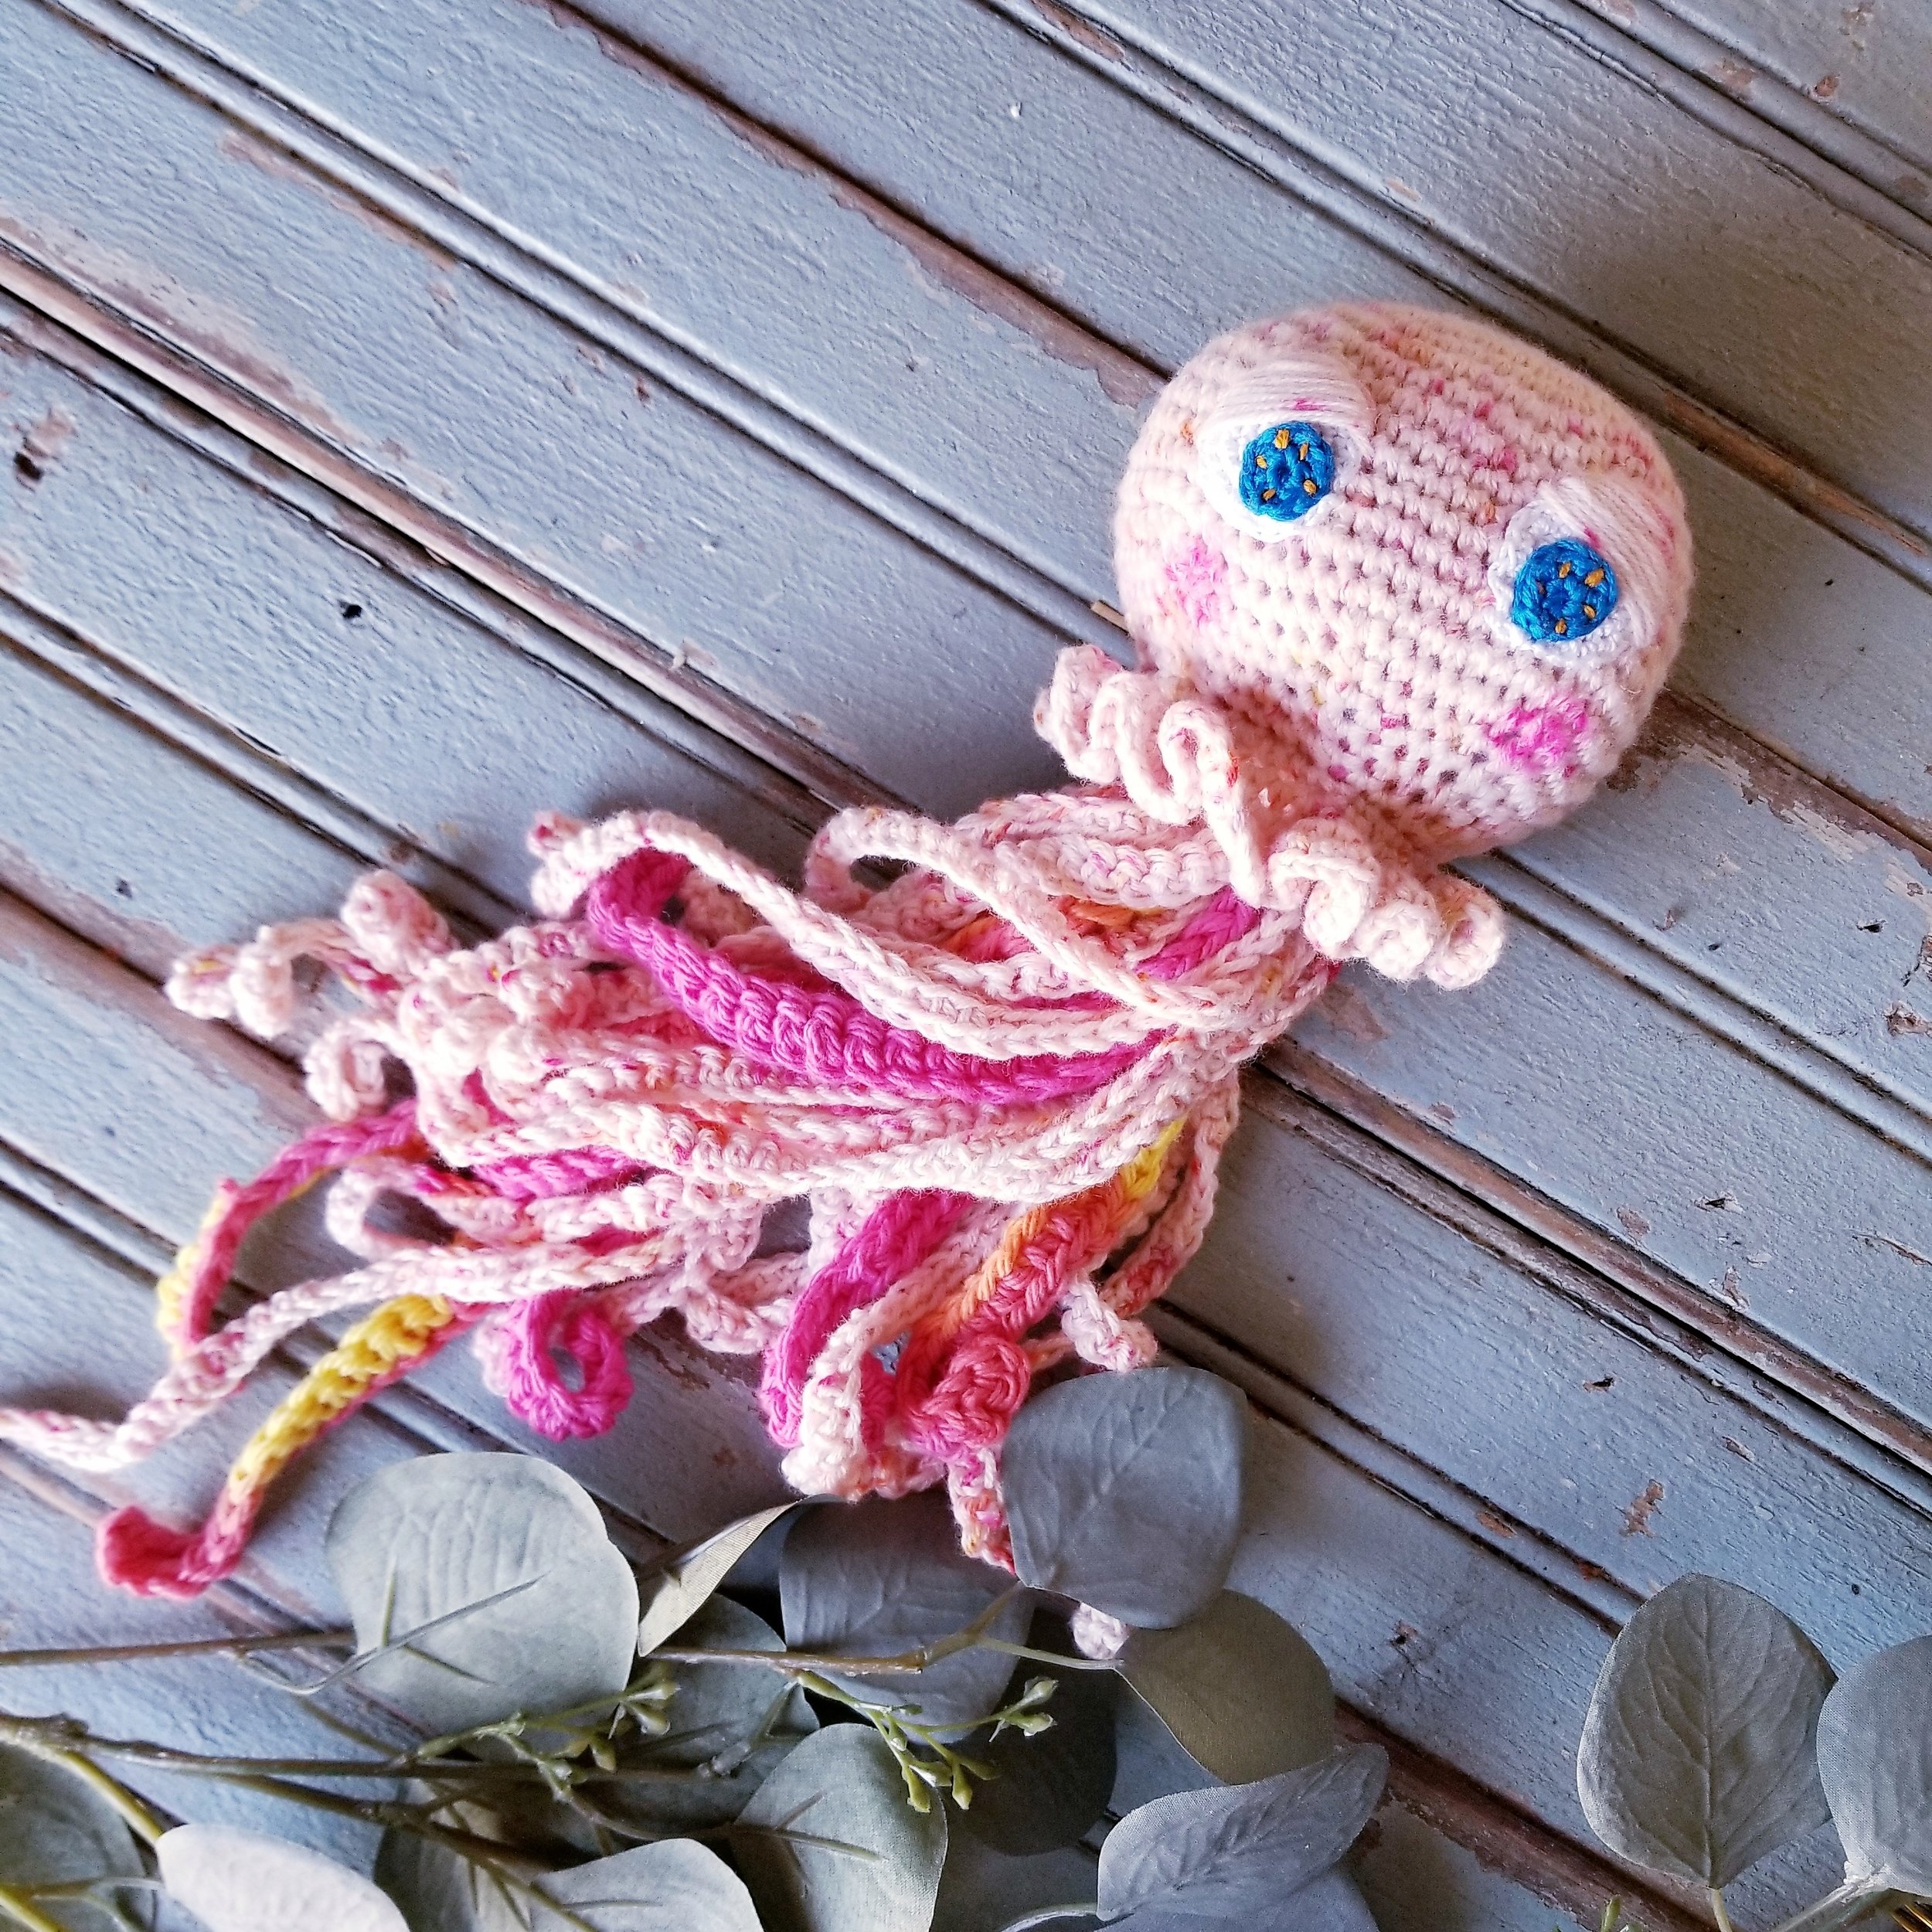
Free Crochet Jellyfish Pattern
This post contains affiliate links. I receive a small commission if you purchase a product using my link, but the price of the product remains the same for you. See more details in the Terms of Use.
Materials:
Color A: one ball of any worsted/4 weight
cotton yarn
Color B: scraps of any worsted/4 weight cotton yarn
Color C: scraps of any worsted/4 weight cotton yarn

#10 Thread in white
Embroidery Floss in blue
Embroidery Floss in yellow

Yarn Needle
Embroidery Needle
Stitch Markers
Scissors
Q-tip
Terms:
St—stitch
Sl St—slip stitch
Ch—chain
Sc—single crochet
Sc Inc—single crochet increase
Sc Dec—single crochet decrease
Skills:
Magic Circle—use this tutorial
Work in back bump of chain—use this tutorial
Satin Stitch (Embroidery) - use this tutorial
Notes:
Most of the pattern is working in the round without joins, marking the first stitch of each round. Move the stitch marker up after each row is complete to keep on track with the rounds.
Keep a tight tension throughout the project to keep the fluff in later. You can also use DK/3 weight cotton for a smaller, more delicate jellyfish. The pattern and hook sizes are the same for DK/3 or Worsted/4 weight yarns.
Please note, if you are making this for a preemie or other small baby, the tentacles need to be 8” or 22cm or shorter to prevent a strangulation hazard.
You may need more or less yarn, depending on how long and how many tentacles you make. You will probably use all of Color A
In this photo tutorial, the instructions will be listed below the picture of each step.
This pattern in in U.S. terms.
Body in Color A:

Rnd 1: 7 sc in magic circle (7 sc)

Rnd 2: 2 sc in each (14 sc)
Rnd 3: *2sc in next sc, 1 sc in next sc* repeat 6 more times (21 sc)
Rnd 4: *2sc in next sc, 1 sc in next 2 sc* repeat 6 more times (28)

Rnd 5: *2sc in next sc, 1 sc in next 3 sc* repeat 6 more times (35)
Rnd 6: *2sc in next sc, 1 sc in next 4 sc* repeat 6 more times (42)
Rnd 7: *2 sc in next sc, 1 sc in next 5 sc* repeat 6 more times (49)
Rnd: 8: *2 sc in next sc, 1 sc in next 6 sc* repeat 6 more times (56)
Rnd 9: *2 sc in next sc, 1 sc in next 7 sc* repeat 6 more times (63)

Rnd 10-16: 1 sc in each sc (63)
Rnd 17: *sc decrease across next 2 stitches, 1 sc in next 7 sc* repeat 6 more times (56)
Rnd 18: *sc decrease across next 2 sc, 1 sc in next 6 sc* repeat 6 times (49)
Rnd 19: *sc decrease across next 2 sc, 1 sc in next 5 sc* repeat 6 times (42)
Rnd 20: *sc decrease across next 2 sc, 1 sc in next 4 sc* repeat 6 times. (35)
Fasten off. Leave a long tail—you will use the tail to assemble the base and body later.

Base:
In Color A
Repeat Rnds 1– 5 of the body.

Tentacles:
In Color A and B and C
*Note: Each tentacle is a different length to give Amalfi the appearance of movement. In general, I chained between 20-45 as the foundation of each tentacle. Using this method, my longest tentacle was over 12”. Since I intend to keep this crochet jellyfish for myself, I am not worried about the strangulation hazard for an infant. Keep in mind that if you wish to give this preemie jellyfish to an infant, the tentacles need to be no longer than 8.5” or 22 cm. For my tension, a foundation chain of 35 gave me roughly 8”. I strongly advise you to measure your tentacles before giving the baby jellyfish to an infant. *
Row 1: Ch 35 (or number needed to reach desired length)
Row 2: Working in back bump of chain, sc in 2nd ch from hook and in ea ch. Fasten off—leave a long tail.
The tentacles will naturally curl a little, especially at the end. You can stretch or shape them as desired.
Make as many as you want. I made 22 in Color A, 4 in Color B, and 3 in Color C. Note, you may need more or less yarn depending on how many and how long you make the tentacles for your crochet jellyfish.
Attaching the tentacles:

Lay out the tentacles from smallest to largest, having them sorted by size will speed up the process of attaching them.

Right Side of Base

Wrong Side of Base
Make sure the right side of the Base is facing you. You will want the tentacles to extend from the right side of the base, while the wrong side will be hidden when it is attached to the body. Also, make the body is right side out, as well. You will see the stitches with v’s on the outside of the body.

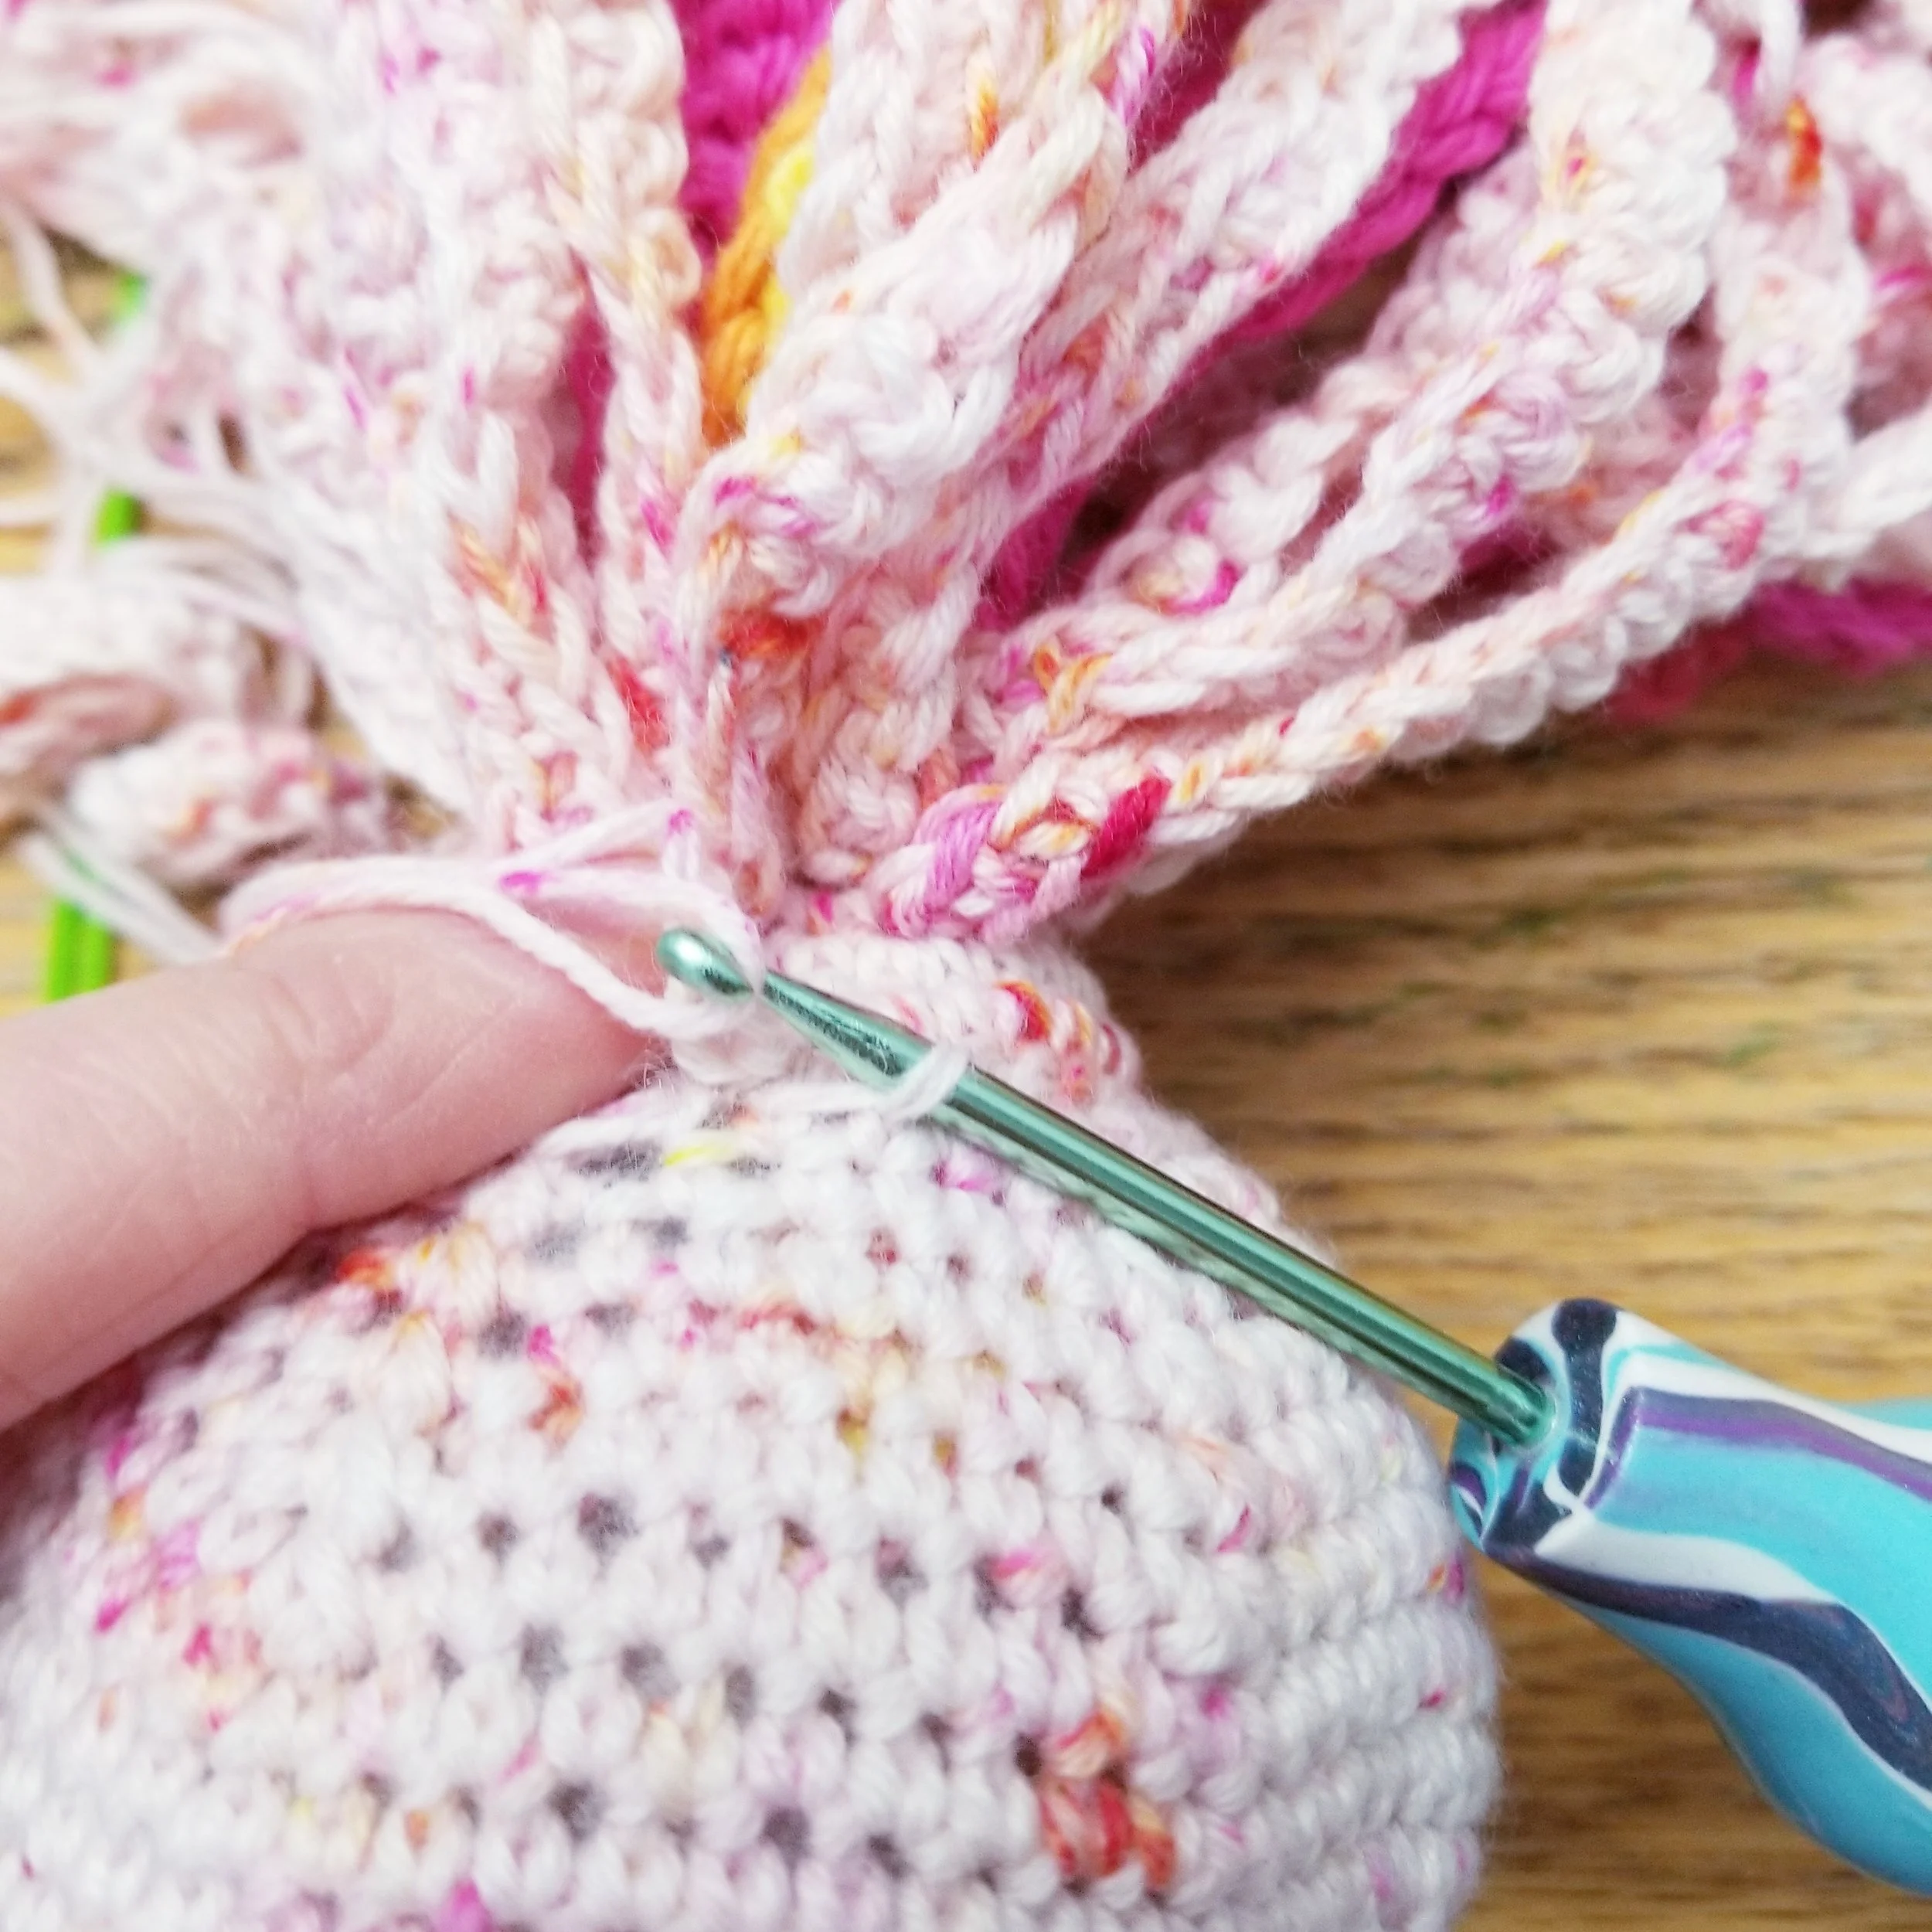
For me, the simplest method is often the best. I inserted my hook from wrong side to right side next to a sc, the pulled one end through. I then inserted my hook on the other side of the same sc (from wrong side to right side) and pulled up the other end of the same tentacle. With both ends pulled through, I tied a tight double knot.

Arrange the tentacles with the longest ones attached to the center of the base, gradually working until the short ones are attached toward the outer edge. I attached the longest tentacles to rounds 1, the mid-length ones to rounds 2-3, and the shortest ones in round 3. Leave rounds 4 and 5 empty, so you have room to attach the base.


After all the tentacles are attached, trim the ends to a manageable length. I like to still leave enough to reattach them should this crochet jellyfish receive some vigorous loving.
Assembly:

Use a couple stitch markers to hold the base to the body of the jellyfish.

Using the long end you left on the body, thread your yarn needle. Insert the needle through both loops of the base and just the back loop of the body. Continue to stitch it together using just the back loop of the body. Leave an opening for stuffing.

Stuff your preemie jellyfish until you are satisfied with the shape. Too little fluff will give you a floppy, misshaped jellyfish, but overstuffing will force the fiber fill out between the stitches. Just keep stuffing until it looks right, but if the stitches are stretching, pull a little out. You can always squish it into the perfect shape later.

Finish seaming up the bottom of the jellyfish. Fasten off and weave in ends.
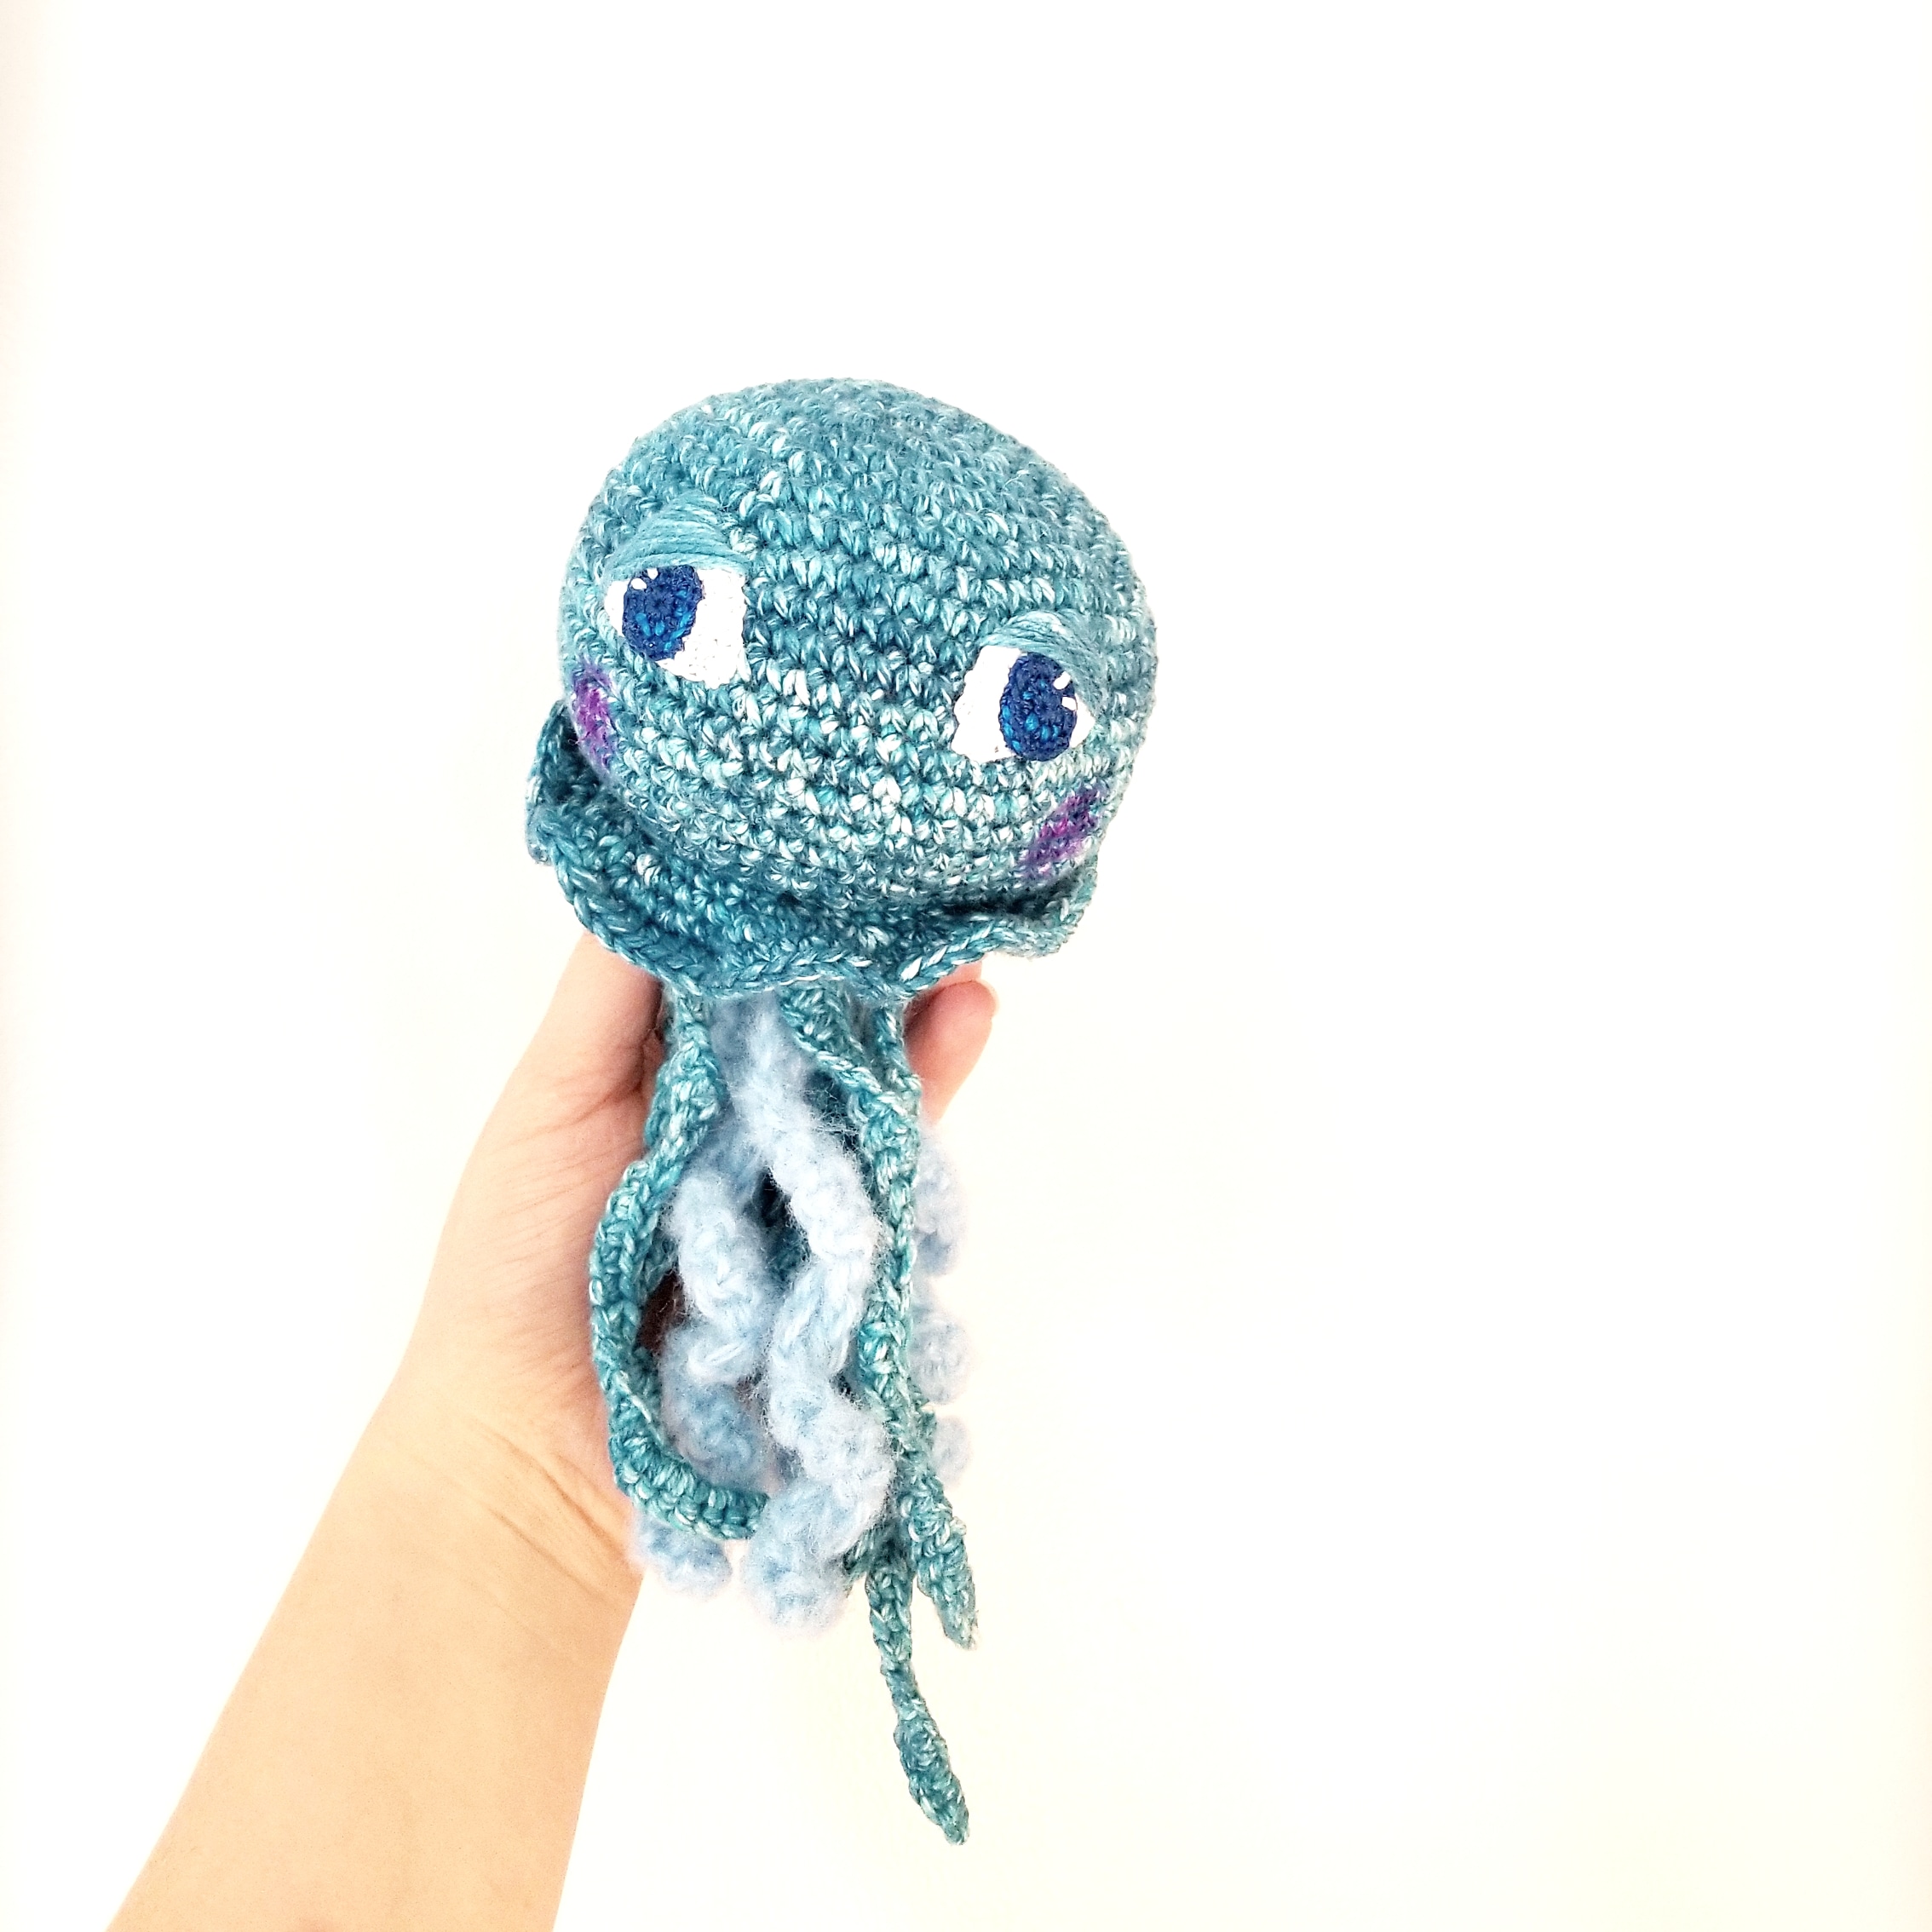
At this point, you can squish the stuffing around to get the shape you want. I stuffed mine so it sort of slopes toward the bottom, but you could also keep it very round, like this one:

Now, for the finishing details!
Ruffle:
With the body facing you and the tentacles facing away from you, insert your hook in the front loop of Round 20. Pull up a loop, ch 1.
Round 1: Sc in front loop of ea st of Round 20. (35) Do not join, to the first stitch, but mark it and continue working.

Round 2: *Sc inc in next st, sc in next st* Repeat 17 times. Sc inc in last st. (53)
Round 3: Sc inc in ea st (106)
Round 4: Sc inc in ea st (212)
Round 5: Sc in ea st (212)
Fasten off, weave in ends.

Eyes:
Outer eye:
In white #10 thread with 1.4 mm hook
Rnd 1: 7 sc in magic circle (7 sc)
Rnd 2: 2 sc in each (14 sc)
Rnd 3: *2sc in next sc, 1 sc in next sc* repeat 6 more times (21 sc)
Rnd 4: *2sc in next sc, 1 sc in next 2 sc* repeat 6 more times (28)
Fasten off, leaving a long tail.

Inner eye:
With full thickness blue embroidery floss
Rnd 1: 5 sc in magic circle (5)
Rnd 2: sc inc in ea (10) fasten off.
Assembly:
Position the Inner Eye in the bottom corner of the outer eye, but still covering the center where the magic circle was.

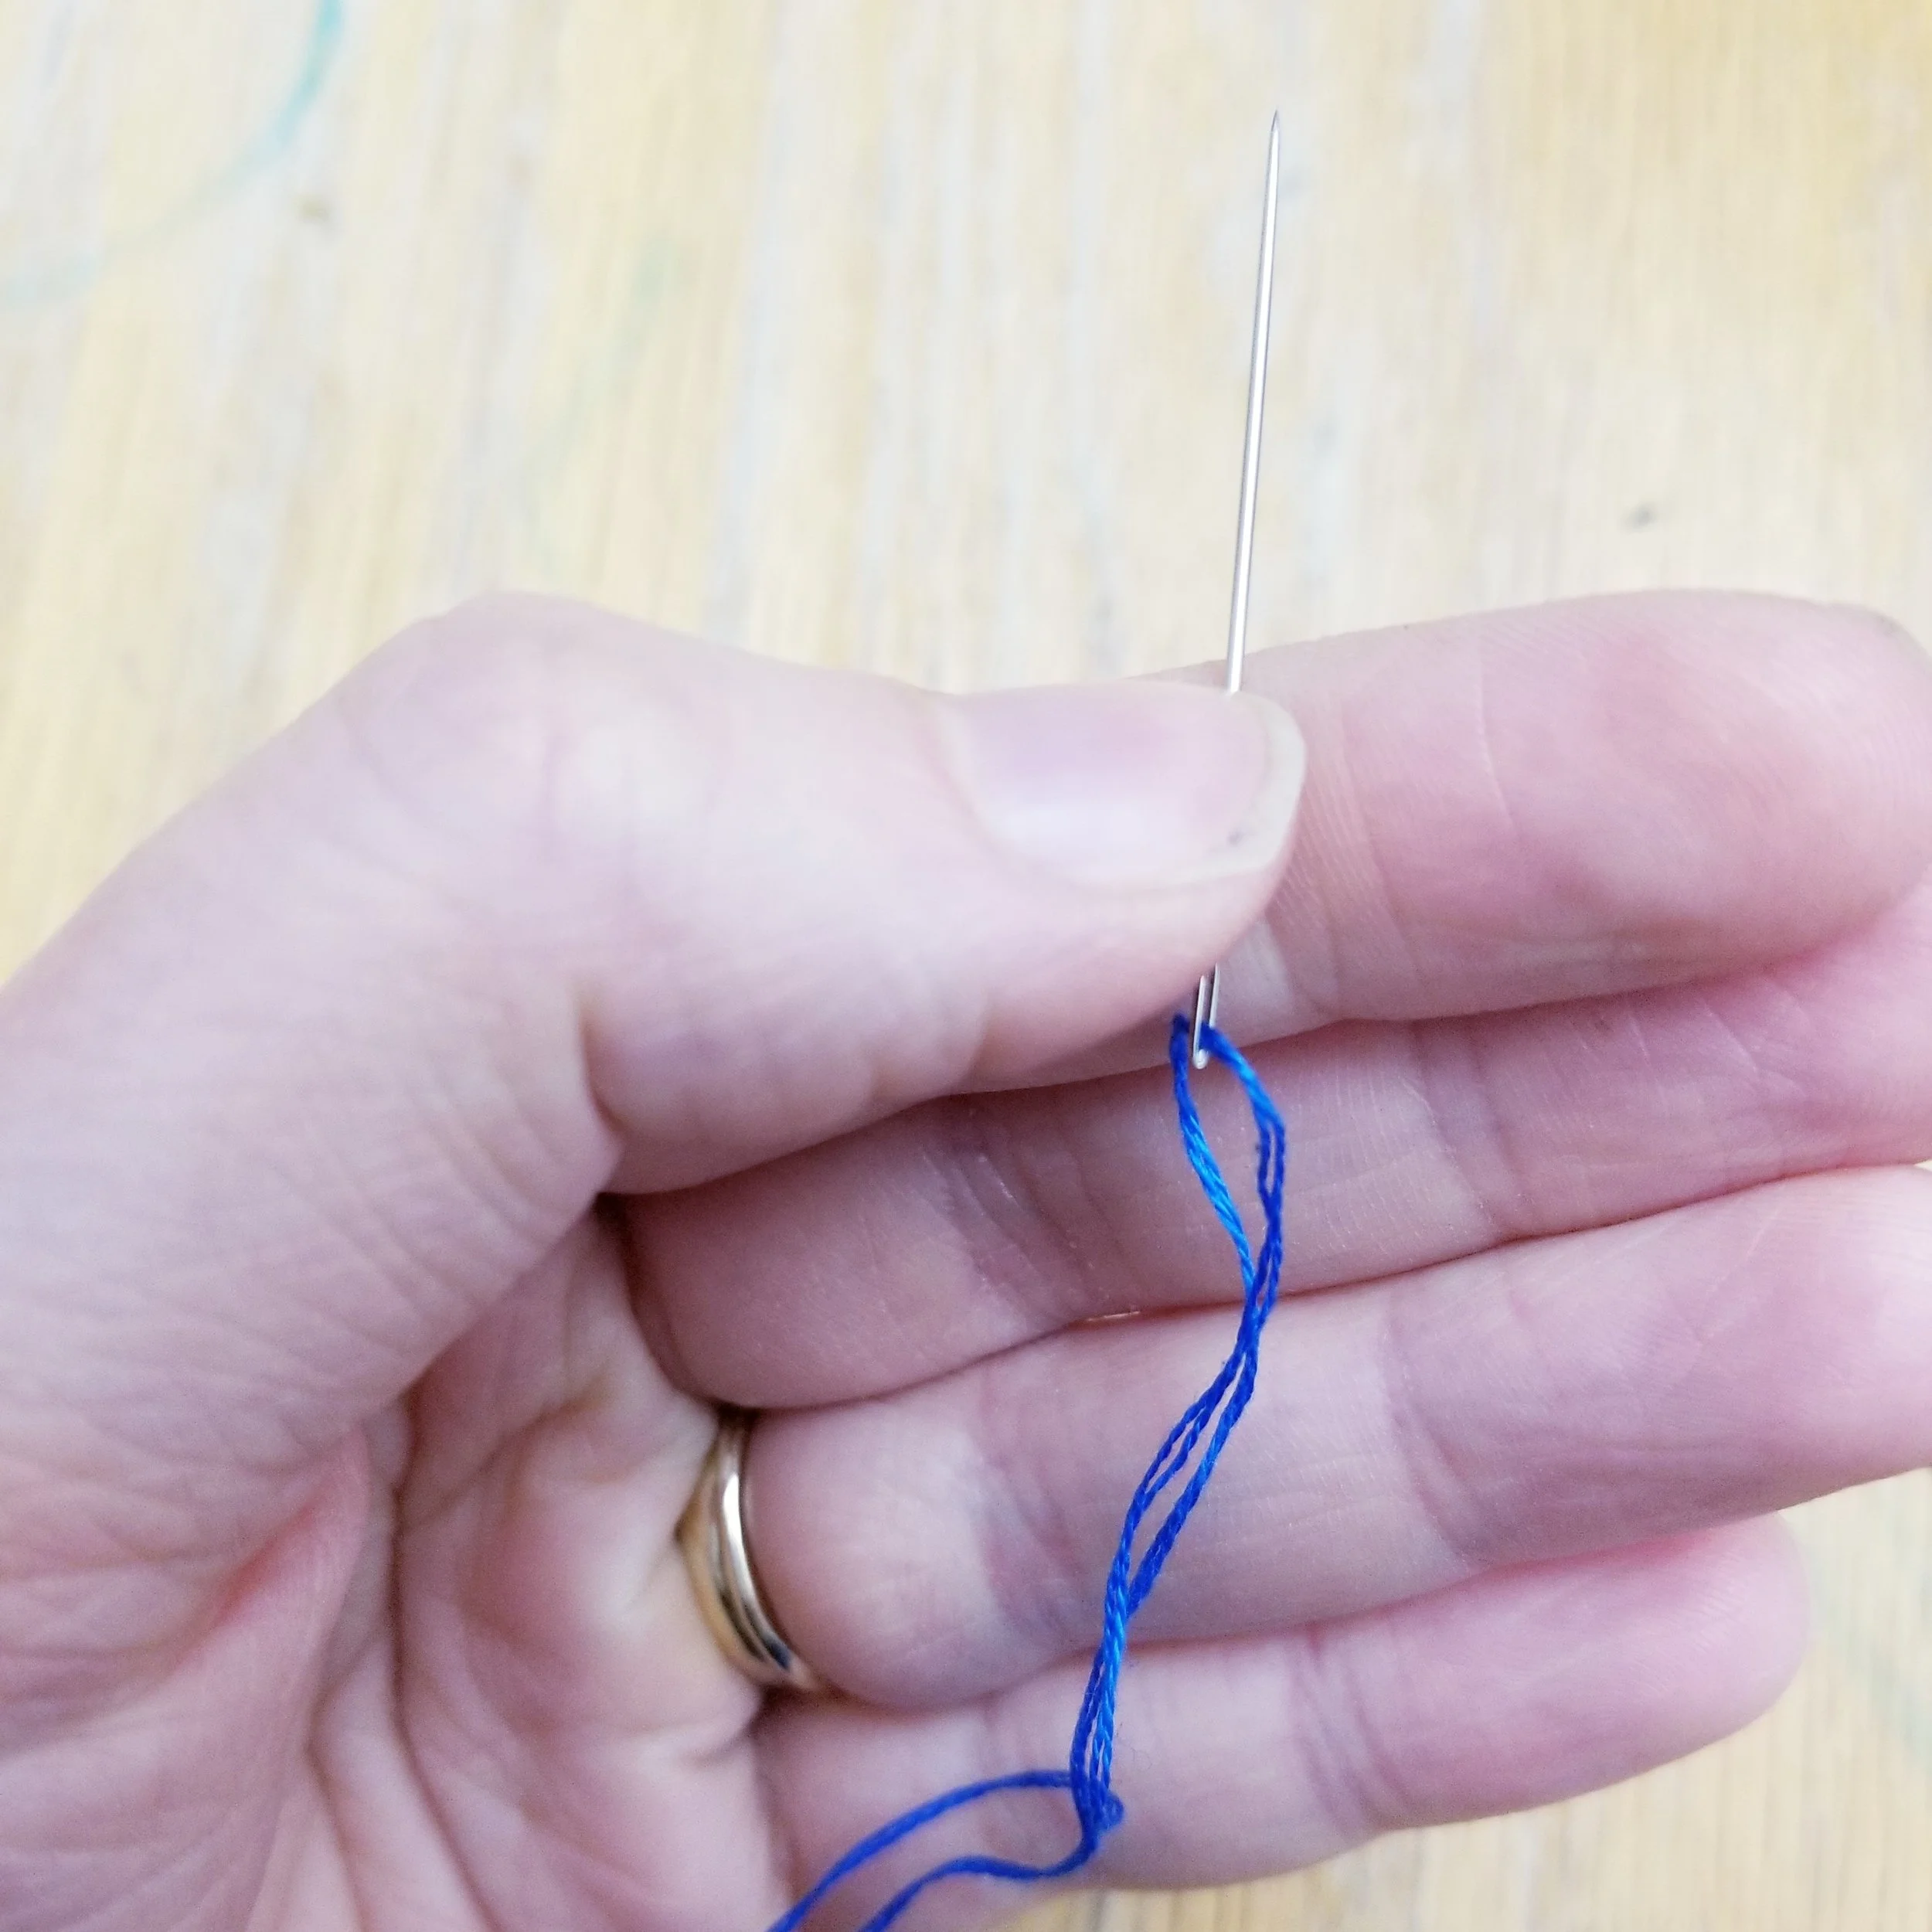
Separate two ply of the embroidery floss. Thread the embroidery needle, pulling the yarn so both ends line up. Knot the ends (it will be hidden). You now have basically four ply. Use a running stitch to attach both eye parts.
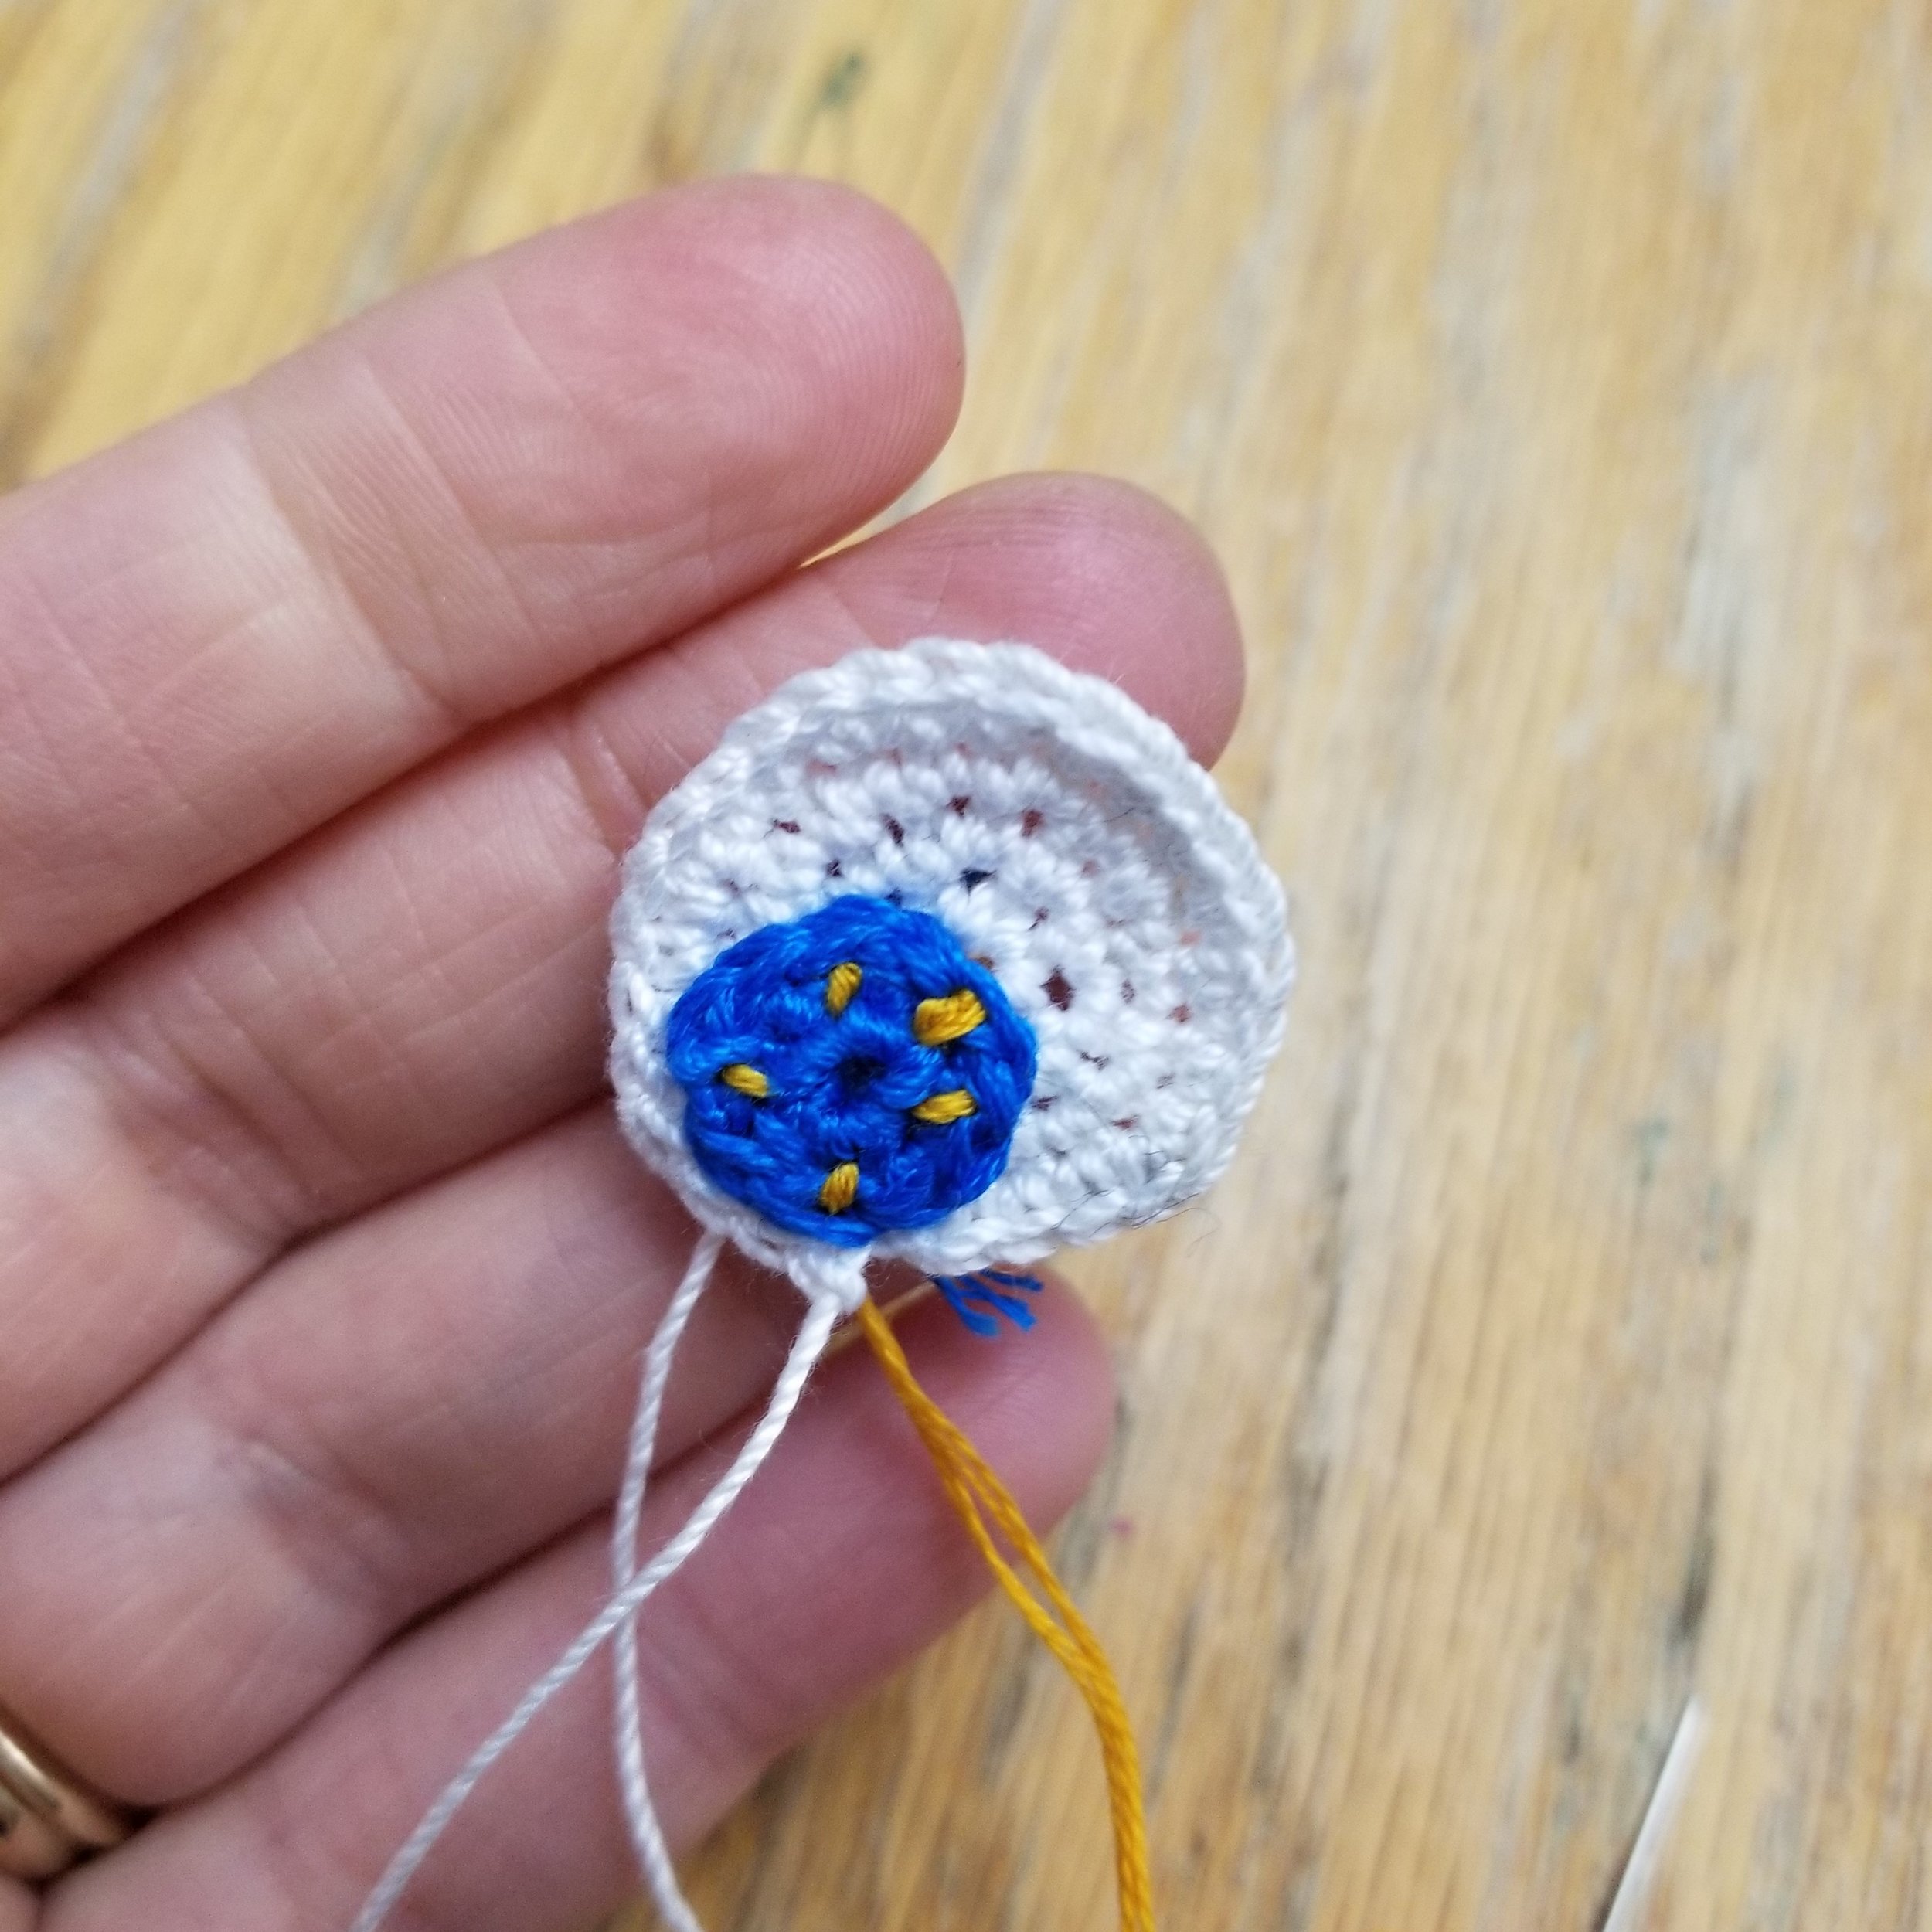
Highlight:
Using two ply of the yellow embroidery floss, thread the needle, pulling until both ends line up. Knot the ends together to make four ply. Stitch five highlights or as many as desired.
You can use any colors, really, to make the eyes super unique! On the blue crochet preemie jellyfish, I used two coordinating blues with a white highlight - using the same technique described above.

Attaching the Eyes:
Using the long tail of the white outer eye, stitch the entire eye to the jellyfish where you think they should go. I just eyeball it and pin them in place first. I always add the eyes after the crochet jellyfish is fully stuffed and assembled, because I feel it helps me to decide where the eyes should go.
Sleepy Eyelids:

Using your yarn needle and Color A, create a satin stitch over upper portion of the eye (not covering the inner eye). Hold your end alongside the eye and work it under the satin stitch.

Be very careful not to pull these stitches tight. They should be loose, so they don’t make wrinkles in the crochet jellyfish’s face.
Also, you may need to line the stitch up manually as you go, so they lay neatly next to each other.
Blushing Cheeks:
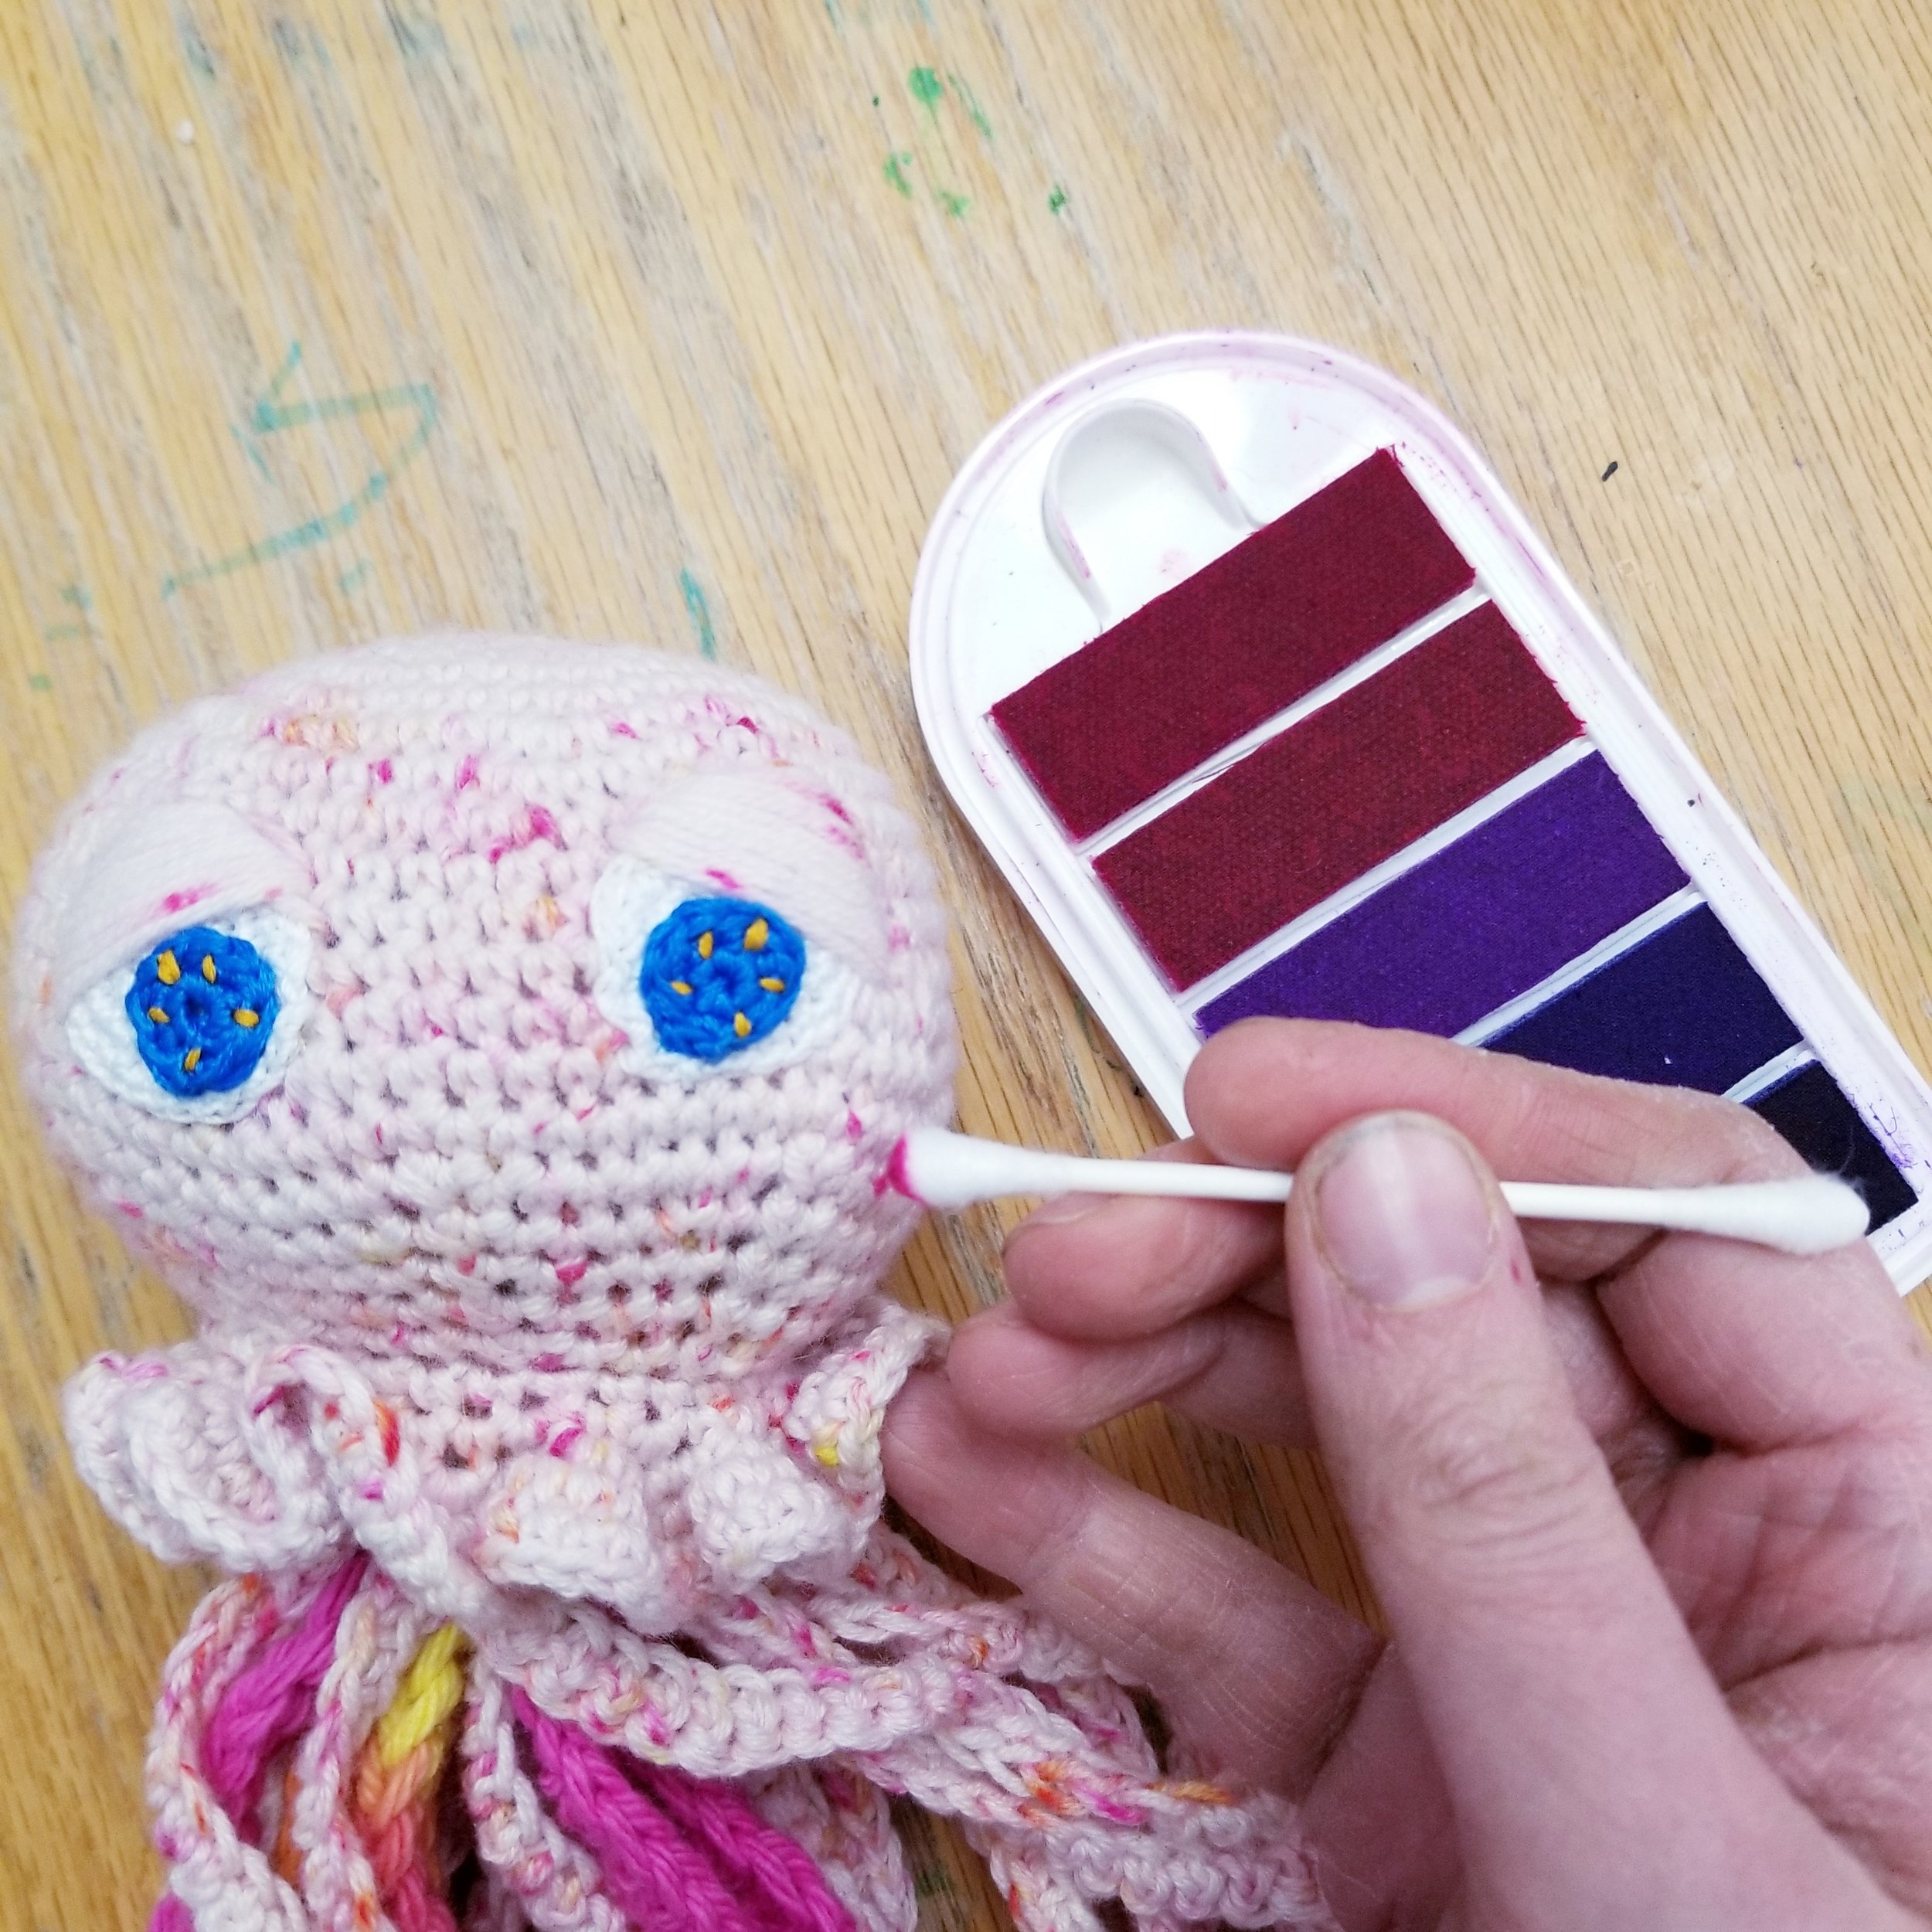
Press your Q-tip into the ink pad.
Rub the ink onto the face of your preemie jellyfish just under and to the outside of the eyes.
Make two circles of blush.

This pattern is written by Rebekah Haas. I hold the copyright to this pattern. It should not be published, shared, or sold without direct permission of the designer. You are, of course, welcome to sell any items you make using this pattern. If you post pictures of your item on Instagram or Facebook, please credit me with the design by linking to my Instagram account or website. Thank you for choosing to make my pattern! I hope it inspires you!


