


San Fior Pumpkin Crochet Pattern
I love autumn. I mean, not a gentle love, like a person might have for the color blue or for bananas. I LOVE autumn. I love the crisp air, the fresh produce, the markets, the colors, the fragrance of spices, my BIRTHDAY. Did I mention that I’m a fall baby? I LOVE my birthday. It’s coming up here in a few weeks and I’m already hinting to hubs, “Did you see this yarn? I’d LOOOOOVE to make a sweater.” In case you wondered, he isn’t really taking the hint.
I’ll be honest, in my excitement to design hats, cowls, scarves, etc, I had not anticipated designing a home décor pattern, like a pumpkin. I loved all the little crochet and knit pumpkins I saw around, but they weren’t the sort of thing I wanted to spend time making - because I just love making wearables so much! However, a friend put it in my head that I should design a lace pumpkin as part of one of my on going pattern series. Naturally, I accepted the challenge and whipped up the San Fior Pumpkin over the weekend.
Like this pattern? Pin it so you can come back to it later!
And don’t forget to follow me on Pinterest while you are there!

Free crochet lace pumpkin pattern. Create stunning fall décor with this crochet pumpkin pattern. #falldecor #crochetpumpkin
This post contains affiliate links. I receive a small commission from your purchase through these links at no additional cost to you. See our Terms of Use for more details.
The Inspiration
I don’t have a fancy story for this pumpkin. I kinda just wanted to make it, so I did. I loved the middle sized pumpkin so much, I knew I wanted to make a big one. My initial vision was for a pumpkin about the size of one you would find at the grocery for carving or making pie. I decided to use bulky yarn for the big one, because I wanted it to be quick and easy to make. However, when adding up the number of repeats, I made a small error. I meant for the pattern to be considerably smaller, but when I tied off that giant pumpkin, my entire family fell in love with it! The testers loved the giant pumpkin! So, naturally, since the pattern was written and tested, I kept it as part of this pumpkin series! As you see in the image above, the pattern is written in three sizes: small, medium, and UNBELIEVABLY LARGE. And I love all three of them!
The Materials
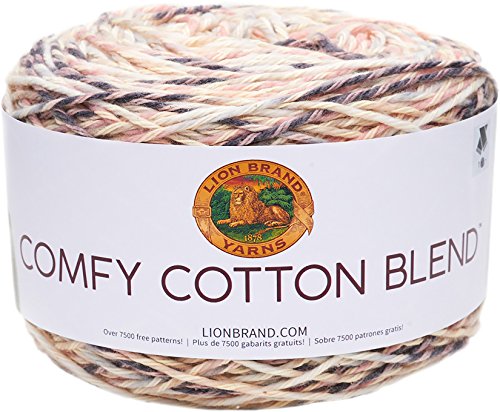
Cotton yarn has such an earthy feel. Something about the weight of it draws me in and asks me to make with it. I used Lion Brand Comfy Cotton for one pumpkin, Hobby Lobby I Love This Cotton for another, and Hobby Lobby Cotton XXL for the jumbo sized pumpkin. I found the Comfy Cotton (dk/3 weight) and the I Love This Cotton (worsted/4 weight) worked up pretty much the same, so I think either of those yarns would work very well for this pattern.
However, I had a much harder time sourcing a bulky cotton yarn. I’m not sure why I have such a hard time tracking down a cotton yarn that I love. I use Hobby Lobby Cotton XXL, which is a fantastic option if you live in the U.S. near a Hobby Lobby. In fact, if I hadn’t been in such a hurry to get this pattern finished, I would have ordered yarn from We Crochet - my current favorite online yarn shop! I used the We Crochet yarn Billow (a thick/thin bulky weight cotton yarn) for my Valle Crucis Cardigan. I used some of the leftovers to make a pumpkin and loved how it worked up! I didn’t have enough of it on hand to make the big one, but it looked so good on the medium size!

We Crochet Billow

Obviously, there are a lot more materials you will need for this pattern. One of the most important tools you need as a crocheter is an ergonomic hook. Crocheting for long periods of time can cause stress to your wrist, shoulders, and hands. Using a quality ergonomic hook will do wonders for relieving pain and increasing the amount of time you can work on a project. I used my Furls Crochet Odyssey hook for this pattern. I prefer to use the nickel topped hook as opposed to their wood hooks when working with cotton, since the cotton tends to have a bit more grip to it than acrylic or wool. When paired with the more grippy wooden hook, I find the crocheting experience to be uncomfortable. However, the cotton yarn glides like an eagle through the western sunset on my Odyssey.

Furls Crochet Hooks
I also used scraps of materials for a lining in this crochet lace pumpkin pattern. You see, the pumpkin is lace. It really doesn’t hold stuffing well by itself. However, having that lining serves a double purpose - not only does it keep the stuffing in place, it also creates a unique look for each pumpkin! I had so much fun selecting the prints and designs for the linings to compliment the crocheted lace skin.
You will also need fiber fill or something to stuff your pumpkins with. Since I don’t often make stuffed things, I really didn’t want to add the cost of fiber fill to my pattern writing budget for this item. So I chose to upcycle some items around my home into stuffing. I have one pumpkin that is stuffed with yarn scraps that are a color I don’t care for, but I couldn’t justify getting rid of the yarn. Another one is stuffed with scraps of fabric shreds from a previous project. Another is stuffed with plastic grocery bags. My giant pumpkin is stuffed with eviscerated pillows. I had some very worn out bed pillows and throw pillows that just needed a second lease on life. Instead of adding them to a landfill, I cut them open and moved the stuffing into my giant pumpkin! The are loving their reincarnation as a symbol of fall festivity!
Finally, the last, and dare I say, most important finishing touch I put on these pumpkins were the ABSOLUTELY adorably pumpkin tags made by my friend Kathy. You can find her on Etsy at kathyskozies. These faux leather pumpkin leaves come in a variety of textures and colors, featuring different phrases. Each set includes two leaves, one that is veined and one with a cute autumn phrase. Use the link below to snag a few for your pumpkins this fall!

Click to explore KathysKozies pumpkin tags and more!
How to get the pattern
You will find the free pattern for the small size pumpkin by scrolling down a little. I’m thrilled to be able to offer this pattern for free! However, I also offer the pattern for sale on both Ravelry and in my Etsy shop. The PDF of the pattern includes a full photo tutorial for the assembly as well as all the details for all three sizes. The full pattern is available for $5.00 on both sites.

Etsy

Ravelry
The Free Small Crochet Pumpkin
Materials
50—150 yds light worsted weight cotton
I used Lion Brand Comfy Cotton
5 mm hook
Yarn needle
Material for lining (I used cotton scraps)
Stuffing
I used leftover scraps of fabric, you can use fiberfill, potpourri, or whatever stuffing you have around.
A stick for the stem
OPTIONAL Faux Leather Leaves from KathysKozies on Etsy
Stitches and Terms (U.S. Terms):
Ch - Chain
St - Stitch
Sl St - Slip Stitch
Sc - Single Crochet
Dc - Double Crochet
Ea - Each
Fch - Foundation Chain
Special Stitches:
Shell Stitch - 5 dc in same stitch
V Stitch - Dc, ch 1, dc
Gauge:
14 stitches x 13 rows = 4”
Start with a chain multiple of 6+1, the follow the instructions for Rows 1-4 of the pattern. Gauge is not crucial to this pattern, since size variation are natural in pumpkins.
Notes:
U.S. Terms
Stitches between *stars* are repeated. Stitches in (parenthesis) are made in the same stitch or space.
Starting chain does not count in this pattern.
This pattern can be made bigger by adding more repeats, if desired.
The San Fior Pumpkin can be made with any weight yarn to achieve the size you want. The smaller size is 5” tall and 6.5” wide. The medium size is 8.5” tall and 10” wide. The large is 18” tall and 24” wide.
After the pumpkin is stuffed and seamed at the top, you can squish the stuffing into the shape you prefer. You can make a tall pumpkin by squishing the pumpkin into that shape, or keep them short and wide, like mine.
I used sticks from my yard for the stem, but you could use a wine cork or cinnamon stick for a different look.
Turn at the end of each row.
Row 1: FSC 31 or ch 32, sc in 2nd ch from hook and in ea ch. (31 fsc)
Row 2:Ch 1, Sc in first 3 sc, ch 2, sk 1 st, *sc in next 5 ch, ch 2, sk 1 st* repeat until three sc remain, sc in last 3 sc. (26 sc)
Row 3: Ch 1, sc in first 2 sc, ch 1, sk 1 st, *v st in ch 2 sp, ch 1, sk 1 st, sc in next 3 sc, ch 1, sk 1 st* repeat until 1 ch 2 sp remain, v st in next ch 2 sp, ch 1, sk 1 st, sc in last two sc. (5 v st)
Row 4: Ch 1, sc in first sc, ch 1, sk 3 st, *shell in v st, ch 1, sk 3 st, sc in next sc, ch 1, sk 3 st,* repeat until 1 v st remain, shell in last v st, ch 1, sk 3 st, sc in last sc. (5 shell st)
Row 5: Ch 1, sc in first sc, ch 1, sk 1 st, sc in next 5 dc, *ch 2, sk 1 st, sc in next 5 dc* repeat until 1 sc remain, ch 1, sc in last sc. (26 sc)
Row 6: Ch 1 (pull it up a little higher), dc in first sc, ch 1, sk 2 st, *sc in next 3 sc, ch 1, sk 1 st, v st in next ch 2 sp, ch 1, sk 1,* repeat until 5 sc remain, sc in next 3 sc, ch 1, sk 1, dc in last st. (4 v st)
Row 7: Ch 1 (pull it up a little higher), dc 3 in first dc, ch 1, sk 2 st, *sc in next sc, ch 1, sk 3 st, shell in v st, ch 1, sk 3 st,* repeat until 2 sc and 1 dc remain, sc in next sc, ch 1, sk 2 st, dc 3 in last dc. (4 shell st)
Row 8: Ch 1, sc in first 3 dc, ch 2, sk ch 3 st, *sc in next 5 dc, ch 2, sk 3 st, * repeat to end, sc in last 3 dc. (26 sc)
Rows 9-14: Repeat rows 3-8. Fasten off. Weave in ends. Block for best results.
Side Seam:
First, measure the height of your piece before seaming, write it down for later.
Fold the rectangle of lace in half, so the two short sides are together.
Starting at Row 1, pick up a loop through both sides and slip stitch them together.
Fasten off, but leave a VEEEEERRRRRYYYY long tail. You will need this yarn to tie up the top and make the creases in the pumpkin.
Bottom Seam:
Using the yarn needle, thread a 10” piece of yarn through it. Weave the yarn in and out of the first row of fsc/sc and cinch together tightly. Tie off and weave in ends.

Side and Bottom Seams
Pumpkin lining
*I’ve included these instructions instead of a template, so you can get the most accurate lining if your pumpkin is a little bigger or smaller than mine.
1. Measure the height of your crocheted piece (you should have written it down).
2. Measure and cut a piece of yarn 2.5” LONGER than your measurement. Tie one end to a marker and one end to a pin.
3. Fold your material in half, and place the pin on the fold where the center of the circle will be.
4. Pull the string taut and draw a half circle from one end of the fold to the other.
5. Cut along the half circle line.
6. Unfold. You should have a circle that will perfectly fit in the unique size of your crochet lace pumpkin with plenty of room to fluff out the top.

Lining and Stuffing
1. Line up the center point that you marked with the bottom, cinched up seam of your pumpkin. If you want, secure it with a couple stitches. I did with one of mine, but I was too lazy to sew it together on the second.
2. Stuff the filling of choice into your pumpkin. You can use fiberfill, which is easily squished to get the shape you want, or you can upcycle yarn ends and leftovers. Either one works quite well.
3. Keep stuffing the pumpkin. You want to overstuff so the stitches really pop when we seam up the top.
4. Using the extra long tail you left after the side seam, weave it in and out of the last row of stitches, leaving the last set of shells free to grace the top of your pumpkin. Fluff out the shells and lining to make a poof on top. Tie off tightly.
Wrap your long tails from the last step around the pumpkin three or four times to create the creases. As you wrap the tails around the pumpkin, pull them tight, so they form they create an indentation in the pumpkin. I also threaded those tails through the ruffle at the top as I continued from one side of the pumpkin to the other. As you pull everything tight, the tails will disappear into the ruffle.

Stuff and add the pumpkin “lines”
Finishing Touches:
1. Trim the lining materials that fluffs out the top to the shape you prefer.
2. Pull up the last row of shells so they are a little ruffle around the top.
3. Add a stem. I just stuck a twig from my yard down in the top seam, but you could hot glue a stick, wine cork, or cinnamon stick into the top seam for a stem.
4. Add leaves from KathysKozies to the top for extra fall flair. I used embroidery thread and needle for this optional step.
5. You can squish the stuffing and adjust the ends that are wrapped around the pumpkin to make bigger and smaller sections to mimic the shape of real pumpkins.
6. Pick a bouquet of wildflowers to style with your pumpkin on your mantel.
You did it!
Congrats! You finished your mini San Fior Pumpkin! Please take a moment to share your pictures either as a review on the Etsy shop or as a project on Ravelry. I’d also love if you tag me in your Instagram posts!

This pattern is written by Rebekah Haas. I hold the copyright to this pattern. It should not be published, shared, or sold without direct permission of the designer. You are, of course, welcome to sell any items you make using this pattern. If you post pictures of your item on Instagram or Facebook, please credit me with the design by linking to my Instagram account or website. Thank you for choosing to make my pattern! I hope it inspires you!


