


How to Take Flat Lay Pictures for Instagram
Something about a well-curated Instagram grid just seems to draw us in! When the colors, the filter, the arrangement of items all work together, they tell a story unique to the human behind the Instagram accounts. So many times over the last few months I have gotten DM’s or comments like “How do you set up your flat lays?”, “Your flat lay photography is amazing!”; and “Can you teach me how to do pictures like that?” So, I’ve decided to reveal all my sneaky tricks for getting the best flat lay photos - all here in this one, concise post!
Like it? Pin it!
And follow me on Pinterest for more inspiration!

How to take STUNNING Flat Lay Photos for Instagram
This post contains affiliate links. I receive a small commission from your purchase through these links at no additional cost to you. See the Terms of Use for more details.
Equipement
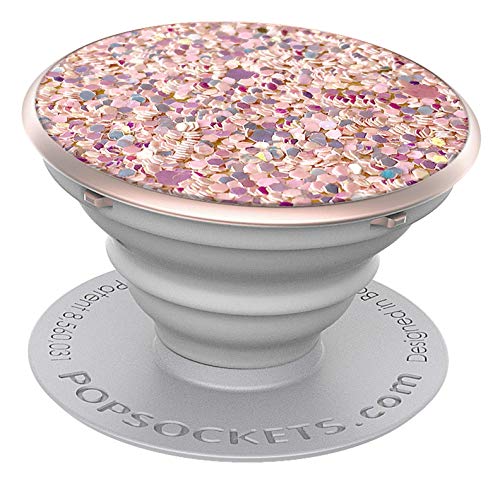
First, let me say, I am NOT a professional photographer. In fact, I’m about as far from a professional photographer as anyone can be. I struggle to photograph large scale things - like people - specifically, my kids! I don’t used a Nikon or Cannon or a fancy camera, I use my Google Pixel 3 xl. I like the forward facing camera using the Portrait setting. My phone in Portrait mode automaticlaly sharpens the focus of the image while blurring the background. It also automatically tones the colors to be a little cooler - which works well for my personal aesthetic. I’m not known for having steady hands, so I keep a pop socket on the back of my phone. This helps me to hold it at odd angles top get the shot I want without dropping my phone or accidentally covering the photo lense. I also happen to have a shiny pink one, because why not???
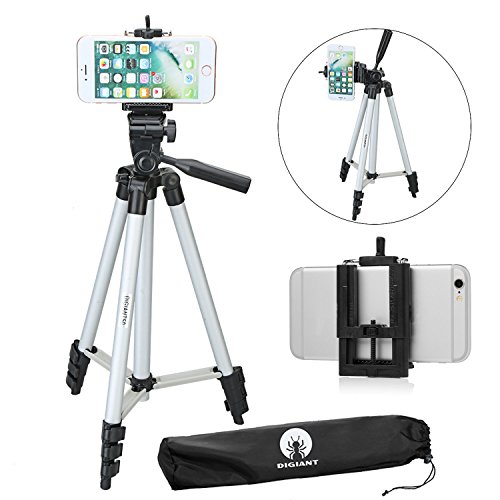
I have a basic tripod that is adjustable to hold any cell phone or can be altered to hold a camera. I didn’t break the bank with this purchase, since at the time I barely had a bank account to speak of! This one is definitely small, a little flimsy, but steady enough to do the job! I would not recommend using this outside in a windy environment - it WILL topple over and scratch your screen on the pavement. TRUST ME. However, it works extremely well to video short clips of what I’m working on at the time, for taking a flat lay picture with my hands in it, or even to stand up and take modeled pictures of my crocheted items. I plan to probably upgrade this item eventually, but if you are on a budget - it does the trick!
That is basically the extent of the equipment I use! Granted, one of these days, I’d love to upgrade my photographing ability with a nice camera, some better light (No, Mr. Sun, of course you are the greatest light in the galaxy!), and maybe other backdrops, but for now - this is what I use.
Backdrop and Props
I am a lover of old things. I like the smell of old books, leather, and wood. I like the worn in, the used up, the well-lived. My signature blue backdrop is my kitchen table. I purchased it on Facebook marketplace from a local handy man who built it using an old barn lean-to roof on top of a falling-apart table base. It secure and sturdy. We eat breakfast on this backdrop, do homework, bake cookies - it is the center of our home. It is worn-in and well-loved. Obviously, I cannot send you a link to where you can purchase my backdrop, but I encourage you to look around your home - do you have an old wooden table with just the right patina? Or maybe a faux fur rug? If you aren’t satisfied after shopping your home for a backdrop, you can find a selection of beautiful scrapbook papers at your local craft store - these work well for small items. I’ve also thought of purchasing a section of bead board from my local hardware store to use as a large backdrop for bigger items.
My props are all sourced from my own home. I try to include a general selection of similar items in each picture. First, (obviously) the crocheted project I want to talk about. Second, I often include something in a natural wood tone - whether it is my hook from Leither, Co. (see my review of their subscription box here), or my rosewood yarn bowl. I also like to include antique books, a piece of stained lace, or my little gold thread scissors.
I love including live plants in my photos. The majority of my photo prop plants are my own little houseplant babies - although I have a few faux greenery sprigs I use from time to time. Something about that little pop of fresh, living plant seems to make my pictures come to life! Of course, if you are a chronic plant killer, just stick to faux plants. I suggest you make sure the leaves are flipped right side up so you can’t see the backs of them. The backs of faux plants is so obviously fake. Also, you can spritz them with a little water to give them that freshly misted look. You can find fantastic faux plants at Marshalls or Ikea.

Flay Lay Photography tips for Instagram
When I feel the need to spruce up my props list, I’ll walk around my house for cuttings from plants, dried flowers, or even make a trip to Goodwill, Marshals, or the Target Dollar Spot for good deals on fun things. Combining old and new stuff can create a very rich look in photography.
The Set Up
I have two general methods of flat lay photography: grid and layered.
The Grid:
When I make a grid flay lay, I want to lay all my items out in a neat and orderly fashion. I start by filling in the corners of an imaginary square - I’ve been known to pull out a ruler on days I feel like I just can’t eyeball it right. After I balance the corners, I lay the center piece. The centerpiece is often either the item I am working on, or the main message I want to communicate in the post the picture will accompany. After the large pieces are set, I fill in the rest with smaller items until I am happy. Then I snap the picture.
For my grid layouts, I generally stick with a basic color scheme throughout, not layering in too many colors. I’m aiming to provide a pleasing symmetry, not a deeply layered story. In the photo above, I have gold and white, with a subtle pop of green to make the image feel alive.

Flat Lay Photography for Instagram
The Layered:
With the layered look, I select pieces that can be easily stacked. I’m creating height - which also creates shadow and highlights. I always make sure to angle my layered flat lay toward the light, so the item I want highlighted shines out, which the others create depth and shadow. These sort of flat lays feel deep and cozy - at least, to me.
I start with my bottom layer - usually a doily or something with a subtle texture, then I will create my height - in the picture above, I used a stack of books you can just peek in the cover. On top of the books is a vine, which creeps down into the picture. I’ve stacked my highlighted piece (the hat I’m working on), centered to catch the light, under some pieces, over others - but definitely in the focal point.
I often use a little more depth of color with layers, although I kept it simple with this one pictured above. You will see more colorful ones as we go.

DIY Mandala Earrings
Combination:
Sometimes I mix a little of grid and layered. I start with my four corners and fill in, but I also create depth and layers by making small, almost imperceptible stacks of things throughout. I also like to layer in more color sometimes, as shown in the photo below:

Flat Lay photography for Instagram
Editing
Yes. I edit my photos. I’ve used several editing tools as I’ve grown, starting with Instagram filters, then using Pixlr app - which I liked, but I couldn’t preset my choices. I had to edit each item of each picture individually, which became very time consuming. Now I use Adobe Lightroom. I purchased several presets and played around with them and the other settings until I found a setting that I felt captured my imagination and intention.
My preset brightens the picture, gives it a cool-toned appearance, sharpens the image, deepens the shadows slightly, and picks up the highlights slightly more. I also add a medium grain - because I like the sort of antique feel it gives.
I crop all my photos to fit their intended use - but usually to the 1x1 that Instagram demands. I don’t like to be surprised when I’m uploading a photo and suddenly realize the aspect ratio cuts off my favorite part. I try to keep in mind the square when I’m shooting, so I don’t fill the entire frame with goodness, only to have to cut it out later.
Before editing:

Flat Lay photography for Instagram
In the image above, I’ve created a layered, textured flat lay focusing on the cozy, autumnal feeling. Before edits, there is a lot of negative space at the bottom - taking the intended 1x1 aspect ration into consideration.
In spite of the lovely filtered sunlight I had today, the photo seems a little dim to me - it doesn’t dray me in, it won’t jump out of a feed of nice, professional-looking photos and demand attention. It is just a nice picture.
Also, there are some areas that are a little blurry because of the shadows or the inadequacy of my phone camera (I know, all the REAL photographers out there are saying, “Just get a real camera!!”). So, I apply my crop and my preset in Adobe Lightroom.
After Editing:

Flay Lay Photography for Instagram
As you can see, the colors are brighter and sharper. The stains on the book are more obvious, the plant is more lively, and the grain in the wood almost seems deeper. Both photos are beautiful, but the second one will stand out a little more in a busy Instagram feed - and that is the goal with Instagram, right? To stand out. To make a statement about your brand and draw people into your community; to enchant and entertain, if only for a minute, the imagination of another maker.
Often I desire to tell a story with my pictures - whether I’m attempting to encourage, inspire, or bring joy in some way - I try to communicate my message through color theory and the arrangement of items in my photos.
Other Notes and Tips
Just so we understand each other - these tips are not well-suited for product photography. When taking pictures for a store, you want them to be bright, simple, and clear. You need to clearly show what you are selling without cluttering up the image with props. The flat lay photography demonstrated above works well for Instagram and blog post images.
Tell your own story. Don’t mimic me - I have my own voice that I use to tell my story through fibers, books, antiques, and plants. Tell your own story. Often we surround ourselves with items we love, items that speak to our souls and bring us joy - that is why I suggest first looking around your home for photo props. The things you love will tell a story that is truly unique to you. So, you can easily take my tips and develop your own style.
Since you are here, head over to Instagram for more flat lay or crochet inspiration! And don’t forget to sign up for my newsletter for all the fun details and stories behind my work!


