Salzburg Beanie, The Original Asymmetrical Beanie: Free Crochet Pattern
Salzburg - Mozart’s home, the filming location of much of the Sound of Music, a place whose history is marked by the musical and lyrical. I remember walking through an old cathedral, organ pipes reaching for the sky; browsing through tourist shops for Mozart chocolates and every other imaginable trinket with his face on it; standing before the abbey, whispering the lyrics to “Climb Every Mountain.” As a musician (yes, I have a degree in music!), this city spoke to my heart in a way few others have - not only is it beautiful, but oh, so musical.
What else would I name such a lyrical design after? The puff stitches lilt across the hat like notes floating from a flute - drifting across my ears, tickling them, warming them. The asymmetrical brim brings a little something different that speaks to my creative heart. Something unusual and not seen before. The brim is no more difficult than a traditional brim, but oh - so stunning! Are you ready to add this lyrical, musical hat to your repertoire?
If you like it, pin it!
And don’t forget to follow me on Pinterest for more incredible ideas!
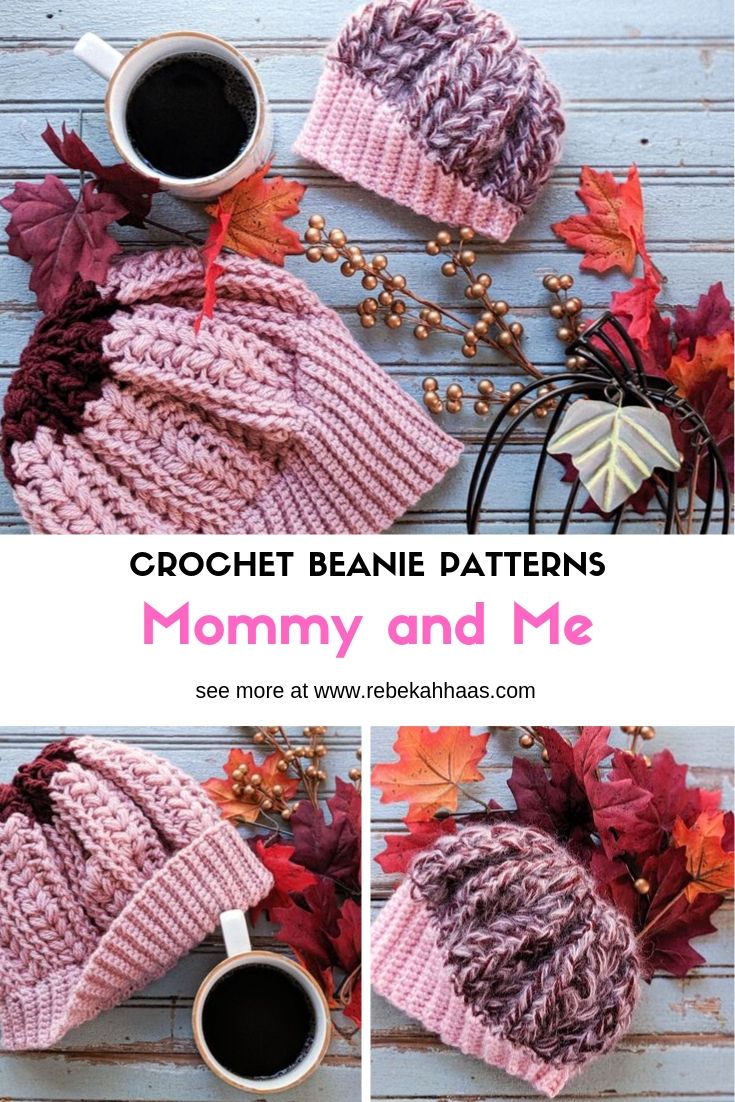
Salzburg Asymmetrical Beanie: Mommy and Me crochet pattern
The Fashion Potential
But how does one wear an asymmetrical brimmed beanie? Not gonna lie, I’ve already gotten this question quite a few times! Naturally, I’ve already played around with styling mine - even though it still feels like summer outside. I can safely say, I will be wearing this hat A LOT this fall and winter!
First, show off the asymmetry! I love wearing the hat to show off the angled brim. The seam for the brim of the hat is at the narrowest part, but if you put the seam on the side, the angled line of the brim is displayed nicely across the front. I think this is my favorite way to wear it - because it shows off the full uniqueness of the Salzburg crochet beanie.
Second, put the seam in the back and fold the thick part of the brim. You are left with a beautifully textured slouchy cap with a rolled brim. It still looks stunning, but might be something you feel you could “pull off”, if the asymmetrical brim feels too different for you.
Of course, you can wear it however you want - if you make it, it’s yours to wear and show off your mad maker skills!

Salzburg Asymmetrical Beanie: Free Crochet Pattern
Salzburg Modifications
Of course, if you don’t feel confident in the crochet asymmetrical brim beanie - I’ve made a full post on how to modify this free crochet beanie pattern to look more traditional. You can add the straight brim, a pom pom, even a bun beanie top! More than anything, I want you to love what you create from my patterns and to feel confident wearing your own creations. Check out my other post if you are interested!

Salzburg Beanie
This post contains affiliate links. I receive a small commission from items purchased through these links at no additional cost to you. See my Terms of Use for details.
The Yarn
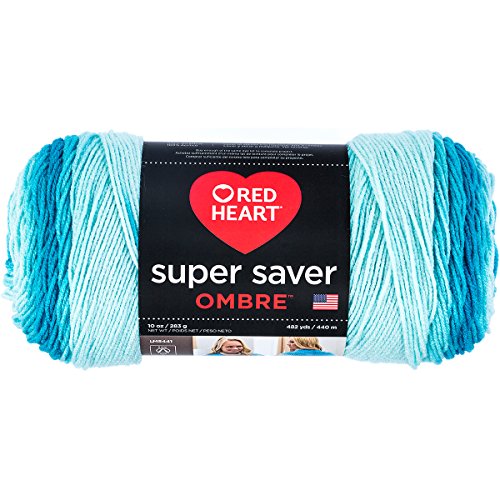
To create this free crochet hat pattern, I used a simple worsted/4 weight yarn. The brand I used is I Love This Yarn from my local Hobby Lobby store. You could crochet this hat using Caron Simply Soft, Red Heart Super Saver, or any other acrylic, worsted/4 weight yarns.
The Possibilities
In this blog post you will find the FREE Mommy and Me pattern set for the Salzburg Asymmetrical Beanie - in Adult Large and Newborn. I chose to feature these sizes here because I am currently pregnant with my baby girl - and I can’t wait to put a little hat on her newborn head (ya know, later - after she is born).
The body of the hat pattern is worked in multiples of five, so if your brim is made in multiples of five rows, the stitch repeat will work out just fine - this means you can measure the head of the person you want to wear it and make it to fit! However, I realize the asymmetrical brim for this hat might be challenging to calculate the angle of the increase and decrease - ok, the truth is, it IS challenging to calculate it!! How do I know? Because I’ve already done all the math! And - let me tell you - it kept me up soooo late for soooo many nights to get it right! In fact, I did the math for sizes NB (featured here), 3-6 m, 6-12 m, 2-5 yrs, 5-10 yrs, preteen/teen/adult small, and adult large (featured here).
Where are all the sizes with the math done and the pattern written out clearly? In my Ravelry shop! In fact, you can purchase the full, premium PDF for only $3.00.
Ready to crochet your Salzburg Asymmetrical Beanie?
Pattern:
Gauge:
Brim: 2” = 8 st x 8 rows
Worked in sc, BLO using G/4.25 mm hook
Body: 2 rows of fpdc and puff st = 2”
Worked in stitch repeat with I/5.5 mm hook
The width depends on the thickness of the puff st. See Notes.
***Please double check your gauge before beginning the pattern. Some of my testers needed to use a smaller hook to get the right brim guage.
Materials:
Worsted/4 weight yarn 200– 350 yds (depending on size)
Color A
Color B (optional)
I/5.5 mm hook
G/4.25 mm hook
Yarn Needle
Faux Fur Pom or Pom Pom maker for yarn pom
Stitch Marker - learn to make your own unique ones here!
Stitches and Terms:
Ch—Chain
Sl St—Slip Stitch
Sc—Single Crochet
Sc2tog—Single Crochet 2 Together
Fpdc—Front Post Double Crochet
Fpdc2tog—Front Post Double Crochet 2 Together
Ea—Each

Need help with a pattern?
Notes:
· Turning is implied, not written on the brim section. Please turn at the end of each row.
· When making the body of the hat, work in continuous rounds without joining. Mark the first stitch of the round to not lose your place, moving the stitch marker up as you begin the next round.
· Stitches written in (parenthesis) are worked in the same stitch or space.
· Stitches between *stars* are repeated.
· The hat is worked in a multiple of five. As long as your brim is a multiple of five, the stitch pattern will work.
· Puff Stitches: As a general rule, I used three loops for my puff stitches, but I pull them up quite high for them to be puffy. You can add more loops to your puffs to get your desired puffiness. Puff stitches are closed with a ch 1. This ch 1 counts as the top of the puff stitch—all stitches worked in a puff st are worked in that ch 1.
· Front Post Stitches: Remember, when working front post stitches, do not work in the top of the st you worked the fpdc around.
· Brim: The increases and decreases are worked on the same side of the brim to form an arch above a straight base. see image.
· Sc2tog: In the body of the hat, work the sc2tog in the top of the fpdc and top of the Puff Stitch.

Salzburg Asymmetrical Beanie: Brim construction
Size Newborn

Salzburg Asymmetrical Beanie: Free Newborn Crochet Hat Pattern
Finished dimensions: Brim, 12.5” long; hat height, 6”
Brim (in Color A, G/4.25 mm hook):
All stitches are worked BLO. All the increases happen on the same side of the brim to create an even arch—marking the side with the increases might help keep track of where they go. (see additional brim instructions in the Notes)
Row 1: Ch 5, sc in 2nd ch from hook and in next 3 ch. (4 sc)
Row 2—10: Ch 1, sc in ea st (4 sc)
Row 11: Ch 1, sc in ea st until last st, 2 sc in last st. (5 sc)
Row 12: Ch 1, sc in ea st. (5 sc)
Row 13—Row 26: Repeat Rows 11 - 12. (Row 26 = 12 sc)
Row 27 —34: Ch1, Sc in ea st. (12 sc)
Row 35: Ch 1, sc in ea st until last two sc, sc2tog across last two sc. (11 sc)
Row 36: Ch 1, sc in ea st. (11 sc)
Row 37 - Row 50: repeat Rows 33 - 34. (4 sc)
Slip stitch the first and last rows together, forming a seam. With the seam on the inside of the brim, continue to the body of the hat.
If your seam ends on the flat side of the hat, fasten off, weave in ends.
Body of hat (in Color A, I/5.5 mm hook):
The body of the hat is made onto the arched portion of the brim. The flat portion of the brim is the bottom of the hat. Your hat will rise at an angle and may not look tall enough when you start the decrease—don’t worry. It’s supposed to do that.
Round 1: Pick up a loop in the top of the brim seam, or continue from the seam. Ch 1, sc in the side of each brim stitch. Do not join, but mark the first stitch of each row, moving the marker up as you go. (50 sc)
Round 2: *Fpdc in next two st, sk 1, 2 puff st in next st, sk 1* repeat around. (10 repeats)
Round 3—5: *Fpdc in next two fpdc, 2 puff st in the space between the two puff st from previous round* repeat. (10 repeats) If desired, switch to Color B.
Round 6: *Fpdc2tog across next two fpdc, 2 puff st in the space between the two puff st from previous round* repeat. (10 repeats)
Round 7: *Fpdc around fpdc2tog, puff st between 2 puff st of previous round* repeat (10 repeats)
Round 8: Sc2tog around. Sc in last st.
Fasten off, leave a long tail. Turn hat inside out, weave the long tail in and out of last row. Pull tight. Fasten off, weave in ends. Add pom pom, if desired.
Are you loving Mommy and Me sets as much as I am? Check out my Mommy and Me kimono set I made earlier this year - it is a FREE PATTERN!!!

Barcis Kimono
Adult Large

Salzburg Asymmetrical Beanie: Free Crochet Hat Pattern
Finished dimensions: brim length, 21.5”; hat height, 10”
Brim (Color A, G/4.25 mm hook):
All brim stitches are made BLO. See more brim instructions in the Notes.
Row 1: Ch 5, sc in 2nd ch from hook and in next three ch. (4 sc)
Row 2– 10: Ch 1, sc in ea st. (4 sc)
Row 11: Ch 1, sc in ea st except the last st, 2 sc in last st. (5 sc)
Row 12: Ch 1, sc in ea st. (5 sc)
Row 13—Row 42: Repeat Row 11—Row 12. (Row 42: 20 sc)
Row 43—Row 52: Ch 1, sc in ea st. (20 sc)
Row 53: Ch 1, sc in ea st except last two, sc2tog across last 2 st. (19 sc)
Row 54: Ch 1, sc in ea st. (19 sc)
Row 55—Row 85: Repeat Row 52—Row 53. (Row 85: 4 sc)
Sl st last row and first row together, creating a seam. With the seam on the inside of the brim, continue onto the body of the hat.
Body of hat (in Color A, I/5.5 mm):
The body of the hat is made onto the arched portion of the brim. The flat portion of the brim is the bottom of the hat.
Round 1: Ch 1, sc in the side of each brim stitch. Do not join, but mark the first stitch of each row, moving the marker up as you go. (80, 85 sc)
Round 2: *Fpdc in next two st, sk 1, 2 puff st in next st, sk 1* repeat around. (17 repeats)
Round 3—10: *Fpdc in next two fpdc, 2 puff st in the space between the two puff st from previous round* repeat. (17 repeats) If desired, switch to Color B.
Round 11: *Fpdc2tog across next two fpdc, 2 puff st in the space between the two puff st from previous round* repeat. (17 repeats)
Round 12: *Fpdc around fpdc2tog, puff st between 2 puff st of previous round* repeat (17 repeats)
Round 13: Sc2tog around. Sc in last st.
Fasten off, leave a long tail. Turn hat inside out, weave the long tail in and out of last row. Pull tight. Fasten off, weave in ends. Add pom pom, if desired.
Remember…
The Salzburg Beanie is written by Rebekah Haas. I hold the copyright to this pattern. It should not be published, shared, or sold without direct permission of the designer. You are, of course, welcome to sell any items you make using this pattern. If you post pictures of your item on Instagram or Facebook, please credit me with the design by linking to my Instagram account or website. Thank you for choosing to make my pattern! I hope it inspires you!
If you make this pattern, please share pictures! Use these hashtags to share it with others who love this pattern: #salzburgbeanie #asymmetricalbeanie #rebekahhaascrochet
As always, you are more than welcome to sell items you make using this pattern, but I ask that you not use my photos to advertise your products.